
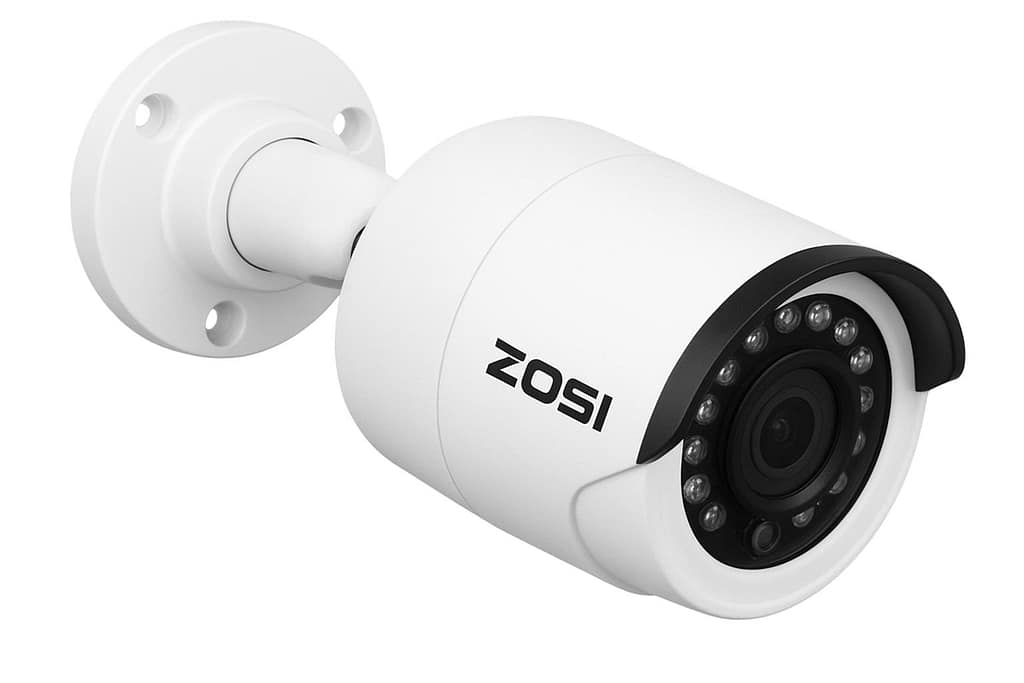
Security cameras are essential for modern homes and businesses, and Zosi cameras are among the most popular choices due to their affordability, reliability, and range of features. One of the first steps in setting up your Zosi camera is understanding its default IP address, which allows you to access and configure the camera on your network.
The default IP Zosi camera is essentially the network address that your camera uses when it is first powered on. This IP address is pre-configured by Zosi and is used to connect your camera to your computer, mobile app, or Network Video Recorder (NVR). Knowing your camera’s default IP is crucial for proper setup, remote access, and troubleshooting.
Many users wonder why a default IP exists and whether it is safe to use it. The reason is simple: manufacturers assign a default IP to simplify initial configuration. Without it, connecting the camera to a network would require manual IP configuration, which can be confusing for beginners. However, using the default IP without changing it can pose security risks, especially if multiple cameras are on the same network. Hackers often attempt to exploit default credentials and IPs, so it is always recommended to change them after setup.
Here’s a quick table showing common default IP addresses for Zosi cameras:
| Zosi Camera Model | Default IP Address | Default Username | Default Password |
| Zosi HD 1080p IP Camera | 192.168.1.108 | admin | 123456 |
| Zosi 720p IP Camera | 192.168.0.20 | admin | 123456 |
| Zosi Wireless IP Camera | 192.168.1.64 | admin | 123456 |
Pro Tip: Always check your camera’s manual or back label for the exact default IP and credentials. These can vary slightly between models or firmware versions.
Understanding your default IP Zosi camera is the first step in taking control of your camera system. Once you have this IP, you can connect the camera to your network, adjust settings, and even assign a static IP to prevent conflicts with other devices.
What is a Default IP Zosi Camera?
When setting up a Zosi camera, one of the first concepts you’ll encounter is the default IP address. This is essentially the “home address” of your camera on your network. Without knowing it, you cannot access your camera’s settings, stream footage on your device, or integrate it with a Network Video Recorder (NVR).
Understanding Zosi Cameras
Zosi is a well-known security camera brand that offers a range of products for home and business security. Their cameras are designed to be easy to set up, reliable, and compatible with various recording systems. The main types include:
- IP Cameras: Internet Protocol cameras that connect directly to your network. These cameras have their own IP address, allowing for remote access and recording.
- HD Cameras: High-definition cameras that may connect via wired or wireless setups.
- Wireless Cameras: These connect to Wi-Fi networks for easier installation and remote monitoring.
- DVR/NVR Systems: Digital and Network Video Recorders that allow multiple cameras to be managed from a single device.
Each type of camera may have a slightly different default IP depending on the model, firmware version, and whether it is intended for wired or wireless use.
What Does “Default IP” Mean?
The default IP is the pre-configured network address set by Zosi when the camera leaves the factory. It allows your computer or mobile app to recognize and connect to the camera immediately. Think of it as a starter key that gives you access to the camera’s settings before any customization.
Default IP addresses are crucial for:
- Initial setup of the camera on your local network.
- Accessing camera settings through a web browser or software application.
- Troubleshooting connectivity issues when the camera does not appear in your network.
Without this default IP, even advanced users would struggle to locate the camera, especially on networks with many devices.
Common Default IP Addresses for Zosi Cameras
Most Zosi cameras use one of a few standard default IP addresses. However, these can vary slightly between models. Common examples include:
- 192.168.1.108 – Often used for Zosi HD 1080p cameras
- 192.168.0.20 – Used for some 720p IP models
- 192.168.1.64 – Found in certain wireless models
Default login credentials are typically:
- Username: admin
- Password: 123456
Security Note: Using the default IP and credentials without changing them can expose your camera to unauthorized access. Always change both the IP (if needed) and password during setup.
Understanding the default IP Zosi camera concept ensures you can properly connect, configure, and secure your camera before use. It is the foundation for all future network settings, including assigning static IPs, enabling remote access, and integrating with multiple devices.
How to Find Your Zosi Camera’s Default IP Address
Finding your default IP Zosi camera is a crucial step in setting up and managing your security system. Without knowing this IP, you won’t be able to access the camera’s interface, adjust settings, or view live footage. Fortunately, there are multiple ways to locate it depending on your device and network setup.
Checking the Camera or Manual
The simplest method is to look directly at your camera or its user manual:
- Most Zosi cameras have a label on the back or bottom showing:
- Default IP address
- Default username and password
- Model number and MAC address
- Default IP address
- The user manual often lists the default IP for different models in a dedicated “Network Settings” section.
Tip: Keep a photo of this label for future reference, especially if you need to reset your camera.
Using Zosi Software to Detect IP
Zosi provides several tools that make finding the camera’s IP easy:
- Zosi Smart App (Mobile):
- Download the app on Android or iOS.
- Connect your phone to the same network as your camera.
- Use the app’s device search or “Add Device” feature to automatically detect the camera.
- Download the app on Android or iOS.
- Zosi IP Finder Tool (Windows/Mac):
- Install the tool from Zosi’s official website.
- Run a scan of your network.
- The tool lists all Zosi cameras with their default IP, MAC address, and model.
- Install the tool from Zosi’s official website.
Using Network Tools
If software tools fail or you prefer advanced methods, network scanning tools are effective:
- Router Admin Panel:
- Log in to your router (usually 192.168.0.1 or 192.168.1.1).
- Look for connected devices or DHCP client lists.
- Identify your camera by model name or MAC address.
- Log in to your router (usually 192.168.0.1 or 192.168.1.1).
- IP Scanning Tools:
- Advanced IP Scanner (Windows) or Fing (Mobile/PC) can detect all devices on your network.
- Look for IP addresses starting with 192.168.x.x, and match them with your camera’s MAC address.
- Advanced IP Scanner (Windows) or Fing (Mobile/PC) can detect all devices on your network.
Pro Tip: Make a list of all networked devices and their IPs to quickly identify your Zosi cameras in the future. This prevents IP conflicts when adding multiple cameras.
Summary Table: Methods to Find Default IP Zosi Camera
| Method | Steps | Recommended For |
| Camera label / Manual | Check physical label or manual | Beginners or single-camera setups |
| Zosi Smart App | Use device search on app | Mobile users, quick detection |
| Zosi IP Finder | Scan network with desktop tool | Multiple cameras or complex networks |
| Router Admin Panel | Check DHCP/connected devices | Advanced users, static IP planning |
| IP Scanner Tools | Scan network for all devices | IT professionals or large installations |
Key Point: Knowing your camera’s default IP is not just for initial setup—it is essential for ongoing maintenance, troubleshooting, and remote access configuration.
How to Access Your Zosi Camera via Default IP
Once you have located your default IP Zosi camera, the next step is accessing the camera to configure settings, view live footage, or integrate it with other devices. There are multiple ways to access a Zosi camera depending on your preferred device: web browser, mobile app, or desktop software.
Connecting to Zosi Camera Using a Web Browser
One of the most common ways to access your Zosi camera is through a web browser on a PC. Follow these steps:
- Open your browser (Internet Explorer, Edge, or Chrome with proper plugins).
- Enter the default IP address of your camera in the address bar (e.g., http://192.168.1.108).
- You will be prompted to enter the default username and password (commonly admin / 123456).
- Once logged in, you can access settings such as resolution, motion detection, and network configuration.
Important Notes:
- Some Zosi cameras require ActiveX or specific plugins to work on browsers like Chrome or Firefox.
- Internet Explorer or Edge often provides the most reliable web interface for older Zosi models.
Using Zosi Mobile App
The Zosi Smart App is an easy way to access your cameras from anywhere:
- Download the Zosi Smart App from the App Store or Google Play.
- Ensure your phone is connected to the same Wi-Fi network as your camera.
- Open the app and choose “Add Device.”
- You can either scan the camera’s QR code or manually enter the default IP and login credentials.
- Once added, you can view live video, playback recordings, and adjust camera settings on your phone.
Advantages:
- Access from anywhere (if remote viewing is enabled).
- Easy interface for managing multiple cameras.
- Push notifications for motion detection alerts.
Using Zosi Smart PSS Software (PC/Desktop)
For managing multiple cameras, the Zosi Smart PSS software is ideal:
- Download and install Zosi Smart PSS on your Windows or Mac computer.
- Open the software and log in or create an account.
- Add your camera using either IP address, QR code, or device search.
- Once connected, you can:
- Live view multiple cameras simultaneously
- Configure motion detection zones
- Set recording schedules and storage options
- Assign a static IP to avoid conflicts
- Live view multiple cameras simultaneously
Pro Tip: Using the desktop software is recommended for businesses or users with multiple Zosi cameras, as it provides centralized management and advanced configuration options.
Summary Table: Accessing Zosi Camera
| Access Method | Steps | Pros | Best For |
| Web Browser | Enter default IP → login | Quick setup, detailed settings | Single-camera setups |
| Zosi Smart App | Scan QR / Enter IP → login | Remote access, notifications | Mobile users, on-the-go monitoring |
| Zosi Smart PSS | Add device via IP or search | Multi-camera management, advanced settings | Businesses, multiple-camera networks |
Key Point: Accessing your default IP Zosi camera is not just for setup. Regular access allows you to optimize security, manage alerts, and troubleshoot network issues efficiently.
How to Change the Default IP of a Zosi Camera
After accessing your default IP Zosi camera, it’s highly recommended to change the IP address for security reasons and to avoid network conflicts. Leaving multiple cameras with the same default IP can cause connectivity issues, while hackers can exploit default IPs and passwords if left unchanged.
Why You Should Change the Default IP
- Security – Default IPs and passwords are widely known and can be exploited by unauthorized users. Changing the IP adds an extra layer of protection.
- Avoid IP Conflicts – Multiple cameras or devices on the same network using the same IP can prevent cameras from connecting properly.
- Network Organization – Assigning custom IPs allows easier management of multiple devices in larger setups.
Changing IP via Zosi Web Interface
- Access the camera through its default IP using a web browser.
- Log in with the default username and password.
- Navigate to Network Settings → TCP/IP Configuration.
- Change the IP address, subnet mask, and gateway:
- Example: IP: 192.168.1.200
- Subnet Mask: 255.255.255.0
- Gateway: 192.168.1.1
- Example: IP: 192.168.1.200
- Save changes and reboot the camera.
Tip: Avoid using IP addresses already assigned to other devices. Keeping a consistent IP range (e.g., 192.168.1.x) is best.
Changing IP via Zosi Smart App
- Open the Zosi Smart App on your mobile device.
- Go to Device Settings → Network Configuration.
- Enter the new IP address manually or switch to DHCP (automatic IP assignment).
- Save changes and restart the camera.
Pro Tip: Using DHCP is useful for beginners, but assigning a static IP is recommended for multiple cameras or NVR integration to ensure stable connectivity.
Changing IP via Zosi Smart PSS (Desktop Software)
- Launch Zosi Smart PSS on your PC.
- Go to Device Management → Edit Device → Network Settings.
- Change the IP address, subnet mask, and gateway as needed.
- Apply changes and reboot the camera.
Advantages of Desktop Software:
- Can manage multiple cameras at once.
- Avoids manual browser plugin issues.
- Easier to keep track of IP addresses for a larger network.
Security Checklist After Changing IP
- Update the camera password to something strong and unique.
- Document the new IP addresses to avoid confusion later.
- Verify that all cameras are accessible after the change.
Pro Tip: Changing the default IP should be part of your initial setup checklist whenever you add a new Zosi camera to your network.
Troubleshooting Default IP Zosi Camera Issues
Even after finding and changing the default IP Zosi camera, users can sometimes face connectivity or access problems. Understanding common issues and their solutions ensures your camera system runs smoothly.
Camera Not Showing Up on Default IP
If your camera does not appear when you enter the default IP:
- Check Network Connections – Ensure the camera is properly connected via LAN cable or Wi-Fi.
- Power Cycle – Turn off the camera, wait 10-15 seconds, then power it back on.
- Check IP Range – Make sure your computer or mobile device is on the same subnet (e.g., 192.168.1.x) as the camera.
- Firewall/Antivirus – Temporarily disable firewalls that might block access.
Pro Tip: Using the Zosi IP Finder tool can help detect cameras not appearing in your network scan.
Forgot Default IP or Login Credentials
If you have lost your default IP or login information:
- Factory Reset – Most Zosi cameras have a reset button. Hold it for 10–15 seconds to restore factory settings, including the default IP and credentials.
- Check Manual or Label – Recheck the camera’s label or user guide for default IP and password.
- Zosi Support – Contact Zosi customer service for assistance with older or updated models.
IP Conflicts or Network Errors
When multiple devices share the same IP, the camera may fail to connect:
- Identify Conflicts – Use your router or IP scanner to see if another device uses the same IP.
- Assign a New Static IP – Follow the steps in the previous section to give your camera a unique address.
- Restart Router and Camera – This ensures all network devices recognize updated IPs.
Other Common Issues
| Issue | Possible Cause | Solution |
| Camera offline intermittently | Weak Wi-Fi signal | Move camera closer to router or use wired connection |
| Cannot log in via browser | Plugin or browser issue | Use Internet Explorer or Edge with ActiveX, or use Zosi app/software |
| Motion alerts not received | App settings misconfigured | Check notification settings in Zosi app and enable push alerts |
Pro Tip: Regularly checking the camera firmware and updating it can resolve many connectivity and performance issues. Zosi releases firmware updates to fix bugs and improve stability.
Summary: Most issues with the default IP Zosi camera can be resolved by checking network connections, resetting the camera, assigning a static IP, or using Zosi’s official tools. Keeping a record of IP addresses, passwords, and device labels helps prevent repeated problems.
Frequently Asked Questions About Default IP Zosi Cameras
Many users have questions when setting up or managing their default IP Zosi camera. Answering these clearly can save time and help both beginners and advanced users.
1. Can I use the camera without changing the default IP?
Yes, it is technically possible to use the camera with the default IP. However, leaving the IP unchanged poses security risks and can cause network conflicts if multiple cameras are on the same network. Changing the IP is strongly recommended, especially for multi-camera setups.
2. How do I reset a Zosi camera to factory default?
- Locate the reset button on the camera (usually at the back or bottom).
- Press and hold the button for 10–15 seconds.
- Release the button and wait for the camera to restart.
- The camera will restore its default IP, username, and password.
Note: Factory reset will erase all previous settings, including network configuration, motion detection, and storage setup.
3. Why is my Zosi camera not connecting to Wi-Fi or LAN?
- Wi-Fi issues: Weak signal or incorrect password. Move the camera closer to the router or verify credentials.
- LAN issues: Faulty Ethernet cable or port. Test with a new cable or switch ports.
- IP mismatch: Ensure your device is on the same subnet as the camera’s IP range.
4. What is the default username and password for Zosi cameras?
- Username: admin
- Password: 123456
Always change the default credentials to prevent unauthorized access.
5. Can I access my Zosi camera remotely?
Yes, using the Zosi Smart App or Zosi Smart PSS software, you can enable remote access. To do this:
- Ensure the camera is connected to a router with internet access.
- Enable remote viewing in the app or software.
- Use your account credentials or cloud ID to log in from anywhere.
6. How do I manage multiple Zosi cameras on one network?
- Assign unique static IPs to each camera.
- Use the Zosi Smart PSS software to organize, view, and record multiple cameras.
- Label each camera in the software for easier identification.
Pro Tip: Keeping a spreadsheet or diagram of all cameras, IP addresses, and locations is helpful for larger setups.
Tips for Managing Multiple Zosi Cameras
For homes or businesses with multiple Zosi cameras, managing them efficiently is crucial to ensure reliable performance, avoid network conflicts, and simplify monitoring. Here are practical tips to help you get the most out of your Zosi camera setup.
1. Assign Unique Static IPs
- Every camera should have a unique IP address to prevent network conflicts.
- Example IP range: 192.168.1.101, 192.168.1.102, 192.168.1.103, etc.
- Avoid using the same IP for cameras and other devices on your network.
- Assign static IPs via Zosi web interface, Smart App, or Smart PSS software.
2. Organize Cameras by Location
- Label each camera in your software based on its physical location (e.g., “Front Door,” “Backyard,” “Office Lobby”).
- This helps quickly identify cameras when monitoring or reviewing footage.
- Use color codes or numbering systems if managing many cameras.
3. Use Zosi Smart PSS Software for Centralized Management
- Ideal for businesses or homes with more than 3–4 cameras.
- Features include:
- Live multi-camera view
- Scheduling recordings
- Motion detection alerts
- Playback of stored footage
- Live multi-camera view
- Centralized management reduces the need to access each camera individually.
4. Maintain a Camera Log
Keep a record of each camera’s:
- Model and firmware version
- Static IP address
- Login credentials
- Physical installation location
This log saves time during troubleshooting, firmware updates, or expanding your system with new cameras.
5. Optimize Network Performance
- Ensure your router supports enough bandwidth for all connected cameras.
- Consider using wired connections (Ethernet) for high-traffic areas to reduce Wi-Fi interference.
- If using Wi-Fi, position cameras closer to the router or use a Wi-Fi extender for stable connectivity.
6. Enable Alerts and Notifications
- Set up motion detection alerts for each camera to stay informed in real-time.
- Configure notifications in the Zosi Smart App or PSS software.
- Group alerts logically by camera location to avoid overload.
Pro Tip: Consistent naming, IP management, and logging are key for scaling up your Zosi camera system. Businesses and large homes benefit greatly from this structured approach.
Security Tips for Your Zosi Camera
Security is one of the most important aspects of managing a Zosi camera, especially if it is connected to the internet. Even with proper setup, leaving default settings or weak credentials can make your camera vulnerable. Here are essential security tips to protect your devices and network.
1. Change Default Username and Password
- Default credentials (admin / 123456) are widely known and easily exploited.
- Use a strong password with at least 8–12 characters, including uppercase, lowercase, numbers, and symbols.
- Avoid using personal information or easily guessable words.
2. Regularly Update Firmware
- Zosi periodically releases firmware updates that fix security vulnerabilities and improve performance.
- Check for updates via the Zosi Smart App or Smart PSS software.
- Schedule regular checks (e.g., every 3–6 months) to ensure cameras are up to date.
3. Enable Network Security
- Use a secure Wi-Fi network with WPA2 or WPA3 encryption.
- If possible, connect cameras via wired Ethernet to reduce hacking risks.
- Consider using a dedicated VLAN or separate network for cameras to isolate them from other devices.
4. Enable Two-Factor Authentication (2FA)
- If your Zosi app account supports 2FA, enable it.
- 2FA adds an extra verification step, making unauthorized access much harder.
5. Disable Remote Access When Not Needed
- If you don’t need remote monitoring, disable it to reduce exposure to potential threats.
- When enabling remote access, use strong account credentials and secure cloud services.
6. Monitor and Audit Access
- Regularly review login activity and alert logs to detect suspicious activity.
- Ensure only authorized users have access to your cameras and account credentials.
7. Physical Security
- Place cameras in secure locations to prevent tampering.
- Ensure reset buttons are not easily accessible to intruders.
Expert Tip: A combination of strong credentials, firmware updates, secure networks, and careful access monitoring will significantly reduce the risk of unauthorized access to your Zosi camera system.
Conclusion
Understanding and managing the default IP Zosi camera is the foundation for a secure, reliable, and efficient camera system. From locating the default IP to accessing your camera, changing its IP, troubleshooting issues, and implementing strong security measures, every step is essential to ensure your system works smoothly.
Key takeaways from this guide:
- Know Your Default IP – Check the camera label, manual, or use Zosi tools to find the default IP.
- Access and Configure Safely – Use web browsers, the Zosi Smart App, or Smart PSS software for setup and ongoing management.
- Change Default IP and Credentials – Assign unique IPs and strong passwords to avoid conflicts and enhance security.
- Troubleshoot Effectively – Common issues like offline cameras, login problems, or network conflicts can be resolved with simple steps like resets or IP reassignment.
- Manage Multiple Cameras – Use structured IP assignment, labeling, and centralized software management for multi-camera setups.
- Prioritize Security – Keep firmware updated, enable network encryption, monitor access, and consider physical security to prevent unauthorized access.
By following these steps, you ensure that your Zosi cameras are fully functional, secure, and easy to manage. Whether for a small home setup or a larger business environment, proper IP management and security practices are crucial for peace of mind and uninterrupted surveillance.
Final Tip: Always document your camera settings, IP addresses, and credentials. A well-organized system saves time, prevents errors, and ensures your surveillance network remains secure and efficient.

