
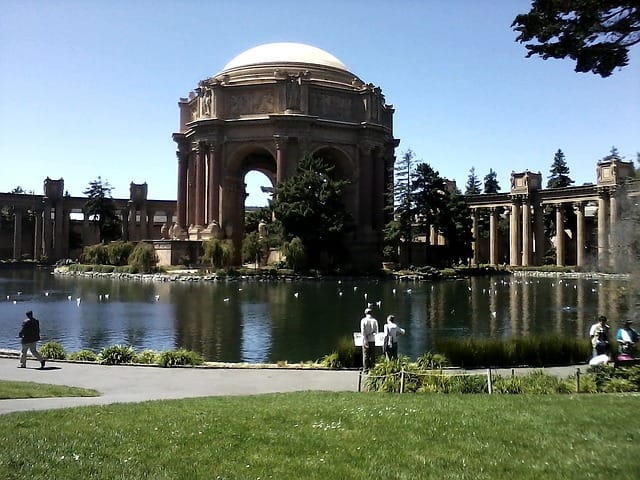
Few places in San Francisco are as timelessly beautiful as the Palace of Fine Arts. With its towering Roman-inspired columns, peaceful lagoon, and grand rotunda dome, it’s a favorite backdrop for engagements, family portraits, graduation photos, and professional photo shoots. This neoclassical landmark, originally built for the 1915 Panama-Pacific Exposition, has become one of the city’s most photographed locations — and for good reason.
In this in-depth guide, we’ll walk you through everything you need to plan a flawless Palace of Fine Arts photo shoot, including:
- The best times of day for magical lighting
- Permit rules and logistics (parking, crowds, accessibility)
- Pose ideas and creative angles to make your photos stand out
- Wardrobe tips that complement the architecture
- Editing, sharing, and preservation tips for your final shots
Whether you’re a couple celebrating an engagement, a family creating lasting memories, or a photographer seeking iconic imagery, this guide will help you capture the magic of one of San Francisco’s most picturesque locations.
“The Palace of Fine Arts isn’t just a monument — it’s a living stage where natural light and classical architecture meet creativity.”
— Local Bay Area Photographer
Before diving into the practicalities, let’s explore why the Palace of Fine Arts remains one of the most sought-after photo-shoot locations in California.
Why Choose the Palace of Fine Arts for a Photo Shoot?
The Palace of Fine Arts isn’t just one of San Francisco’s most recognizable landmarks — it’s a masterpiece of light, reflection, and design that photographers dream about. Whether you’re shooting engagement portraits, lifestyle sessions, or editorial photos, the location’s natural elegance and historical charm elevate every image.
Architectural Beauty & Iconic Backdrop
Constructed in 1915 and later restored in the 1960s, the Palace of Fine Arts was originally designed by architect Bernard Maybeck to showcase art exhibitions. Inspired by ancient Roman and Greek architecture, it features:
- Massive Corinthian columns that create dramatic framing for portrait shots
- A majestic rotunda that glows golden at sunrise and sunset
- A tranquil lagoon that mirrors the architecture for ethereal reflection photos
- Lush greenery and willow trees, softening the stone textures for balanced compositions
This combination of symmetry, water reflection, and soft natural light makes the Palace a natural photo studio. The dome’s open structure allows diffused sunlight to filter through — ideal for portraits that need flattering light without harsh shadows.
“It’s almost impossible to take a bad photo here — the structure does half the work for you.”
— Kelsey Tran, San Francisco Portrait Photographer
| Element | Why It’s Ideal for Photos |
| Rotunda Dome | Offers perfect golden-hour light and grand scale for portraits |
| Lagoon Reflection | Creates depth, symmetry, and mirror-like imagery |
| Colonnades | Great for walking shots and natural framing |
| Green Lawns | Ideal for wide-angle, lifestyle, or family shots |
Versatility for Every Type of Photo Shoot
The Palace of Fine Arts caters to virtually every type of photo session. Its versatility comes from how each corner offers a different mood and texture.
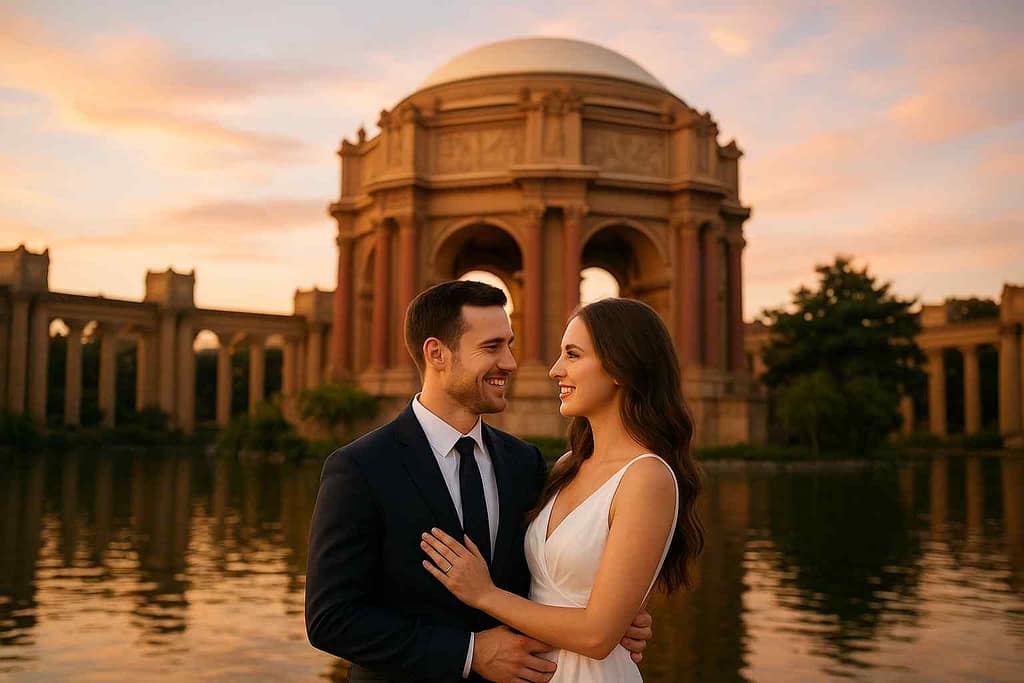
For engagement or wedding shoots:
The romantic arches, reflective pond, and sweeping columns give a cinematic feel. Many couples choose this site for pre-wedding sessions, anniversary photos, or proposals.
For family and portrait sessions:
The shaded pathways and open lawns create comfortable, relaxed spaces for children and families to move naturally.
For professional or creative portfolios:
The architecture adds instant sophistication and credibility to branding or editorial shoots. Fashion photographers often use the columns as a neutral yet dramatic backdrop.
Accessibility and Scenic Setting
Located in San Francisco’s Marina District, the Palace of Fine Arts is easy to reach by car or public transit. It’s just a few minutes from Crissy Field and the Golden Gate Bridge, allowing photographers to capture multiple scenic backdrops in a single session.
Quick Logistics Overview
| Category | Details |
| Address | 3601 Lyon St, San Francisco, CA 94123 |
| Entry Fee | Free (no admission charge for general access) |
| Best Time | Weekdays, sunrise, or 1–2 hours before sunset |
| Parking | Limited free street parking nearby; arrive early |
| Restrooms | Available at nearby facilities |
| Accessibility | Wheelchair-friendly paths, level terrain |
However, photographers should plan ahead — tourists and other photo sessions are common, especially during weekends and evenings. For crowd-free shots, early mornings or midweek afternoons offer the most privacy and serenity.
Planning Your Palace of Fine Arts Photo Shoot
A successful Palace of Fine Arts photo shoot isn’t just about showing up with a camera. The best images are born from thoughtful planning — understanding the light, knowing the layout, and preparing for San Francisco’s ever-changing weather. Whether you’re a professional photographer or a couple planning your own session, these steps will help you get the most out of this iconic location.
Define Your Purpose and Vision
Before anything else, clarify your goal for the shoot. The purpose shapes everything — from wardrobe choices to time of day and even lens selection.
Ask yourself:
- Are you shooting an engagement, family session, graduation, or editorial portfolio?
- What emotion or story do you want your photos to convey — romance, adventure, nostalgia, sophistication?
- Do you prefer a formal aesthetic (posed, cinematic, dramatic) or a candid one (playful, documentary-style)?
Having a vision helps you and your photographer align creatively. Consider building a mood board with sample shots and poses that inspire you. This ensures that the final results match your expectations and the Palace’s unique aesthetic.
“The more intentional your vision, the more effortless your photos will feel.”
— Samantha Lee, SF Lifestyle Photographer
Best Time of Day and Lighting for the Palace of Fine Arts
Lighting can make or break your Palace of Fine Arts photo shoot. The dome’s golden tones and the reflective lagoon respond beautifully to soft, directional light.
| Time of Day | Lighting Quality | Why It Works |
| Early Morning (7–9 AM) | Soft, cool light | Minimal crowds, diffused sun on east side |
| Golden Hour (1–2 hrs before sunset) | Warm, golden tones | Ideal glow on columns and dome |
| Midday (11 AM–2 PM) | Harsh, direct sunlight | Best for shadow play, but avoid facing the sun |
| Evening Blue Hour | Cool, moody tones | Great for creative night photography |
Pro Tip: San Francisco’s fog (“Karl the Fog”) often rolls in unpredictably. Fog can soften light and add mood, but bring extra lighting or reflectors just in case.
“I’ve shot in both blazing sun and heavy fog here — the secret is to work with the weather, not against it.”
— Michael Wu, Bay Area Photographer
Pick Your Shooting Spots Within the Site
The Palace of Fine Arts offers a variety of unique angles. To save time, scout locations in advance or during a different day.
Top Photography Spots:
- The Rotunda Dome: Best for wide shots and romantic framing.
- Lagoon Edge: Perfect for reflection photos and dramatic symmetry.
- Colonnade Walkways: Provides natural leading lines and texture.
- The Bridge & Trees: Soft green tones ideal for lifestyle portraits.
- Rear Garden Area: Less crowded and perfect for close-up shots.
| Spot | Vibe | Ideal Use |
| Rotunda | Classic, grand | Engagement, wedding, fashion |
| Lagoon | Reflective, peaceful | Solo, couple portraits |
| Columns | Textured, dramatic | Editorial or black-and-white shots |
| Garden Path | Romantic, organic | Families or candid poses |
Gear and Camera Settings Tips
The Palace is stunning, but its contrasts between shadows and sunlight can challenge even seasoned photographers.
Here are some tips for your setup:
- Lens Recommendations:
- 35mm or 50mm for lifestyle and portraits
- 70–200mm for tight, cinematic compositions
- Wide-angle (24mm) for architectural shots
- 35mm or 50mm for lifestyle and portraits
- Ideal Settings:
- Aperture: f/2.8–f/4 for blurred backgrounds
- ISO: 100–400 depending on light conditions
- Shutter Speed: 1/200s+ to capture crisp motion
- Aperture: f/2.8–f/4 for blurred backgrounds
- Bring:
- A tripod for long-exposure reflection shots
- Polarizing filter to reduce glare on the lagoon
- Lens hood (for unpredictable glare and fog light)
- A tripod for long-exposure reflection shots
Check for Permits and Regulations
Most casual photo shoots (couples, families, small groups) do not require a photography permit. However, there are a few exceptions.
| Type of Shoot | Permit Required? | Notes |
| Personal/Engagement | ❌ No | Keep crew small, no blocking walkways |
| Family/Portrait | ❌ No | Handheld gear only |
| Commercial/Editorial | ✅ Yes | Apply via SF Recreation & Parks Dept. |
| Drone Photography | ✅ Yes | Must follow FAA & local guidelines |
You can confirm details through the San Francisco Recreation & Parks official website before your session.
Logistics: Parking, Access, and Backup Plan
- Parking: Limited free parking along Lyon Street and surrounding areas. Arrive 30–45 minutes early, especially on weekends.
- Restrooms: Available near the Exploratorium and Marina Green.
- Accessibility: The site is wheelchair-friendly, with paved walkways throughout.
- Backup Plan: Have nearby locations in mind (like Crissy Field or Lovers Lane) in case of crowds or rain.
Local Insight:
“Bring a pair of comfortable shoes — you’ll walk more than you think between shots.”
— Alex R., Engagement Photographer
In short, a well-planned Palace of Fine Arts photo shoot ensures you spend less time worrying about logistics and more time capturing unforgettable moments. By preparing for lighting, gear, and timing, you’ll turn a casual session into a professional-level experience — even if it’s your first time shooting there.
What to Wear & Style Suggestions for Your Palace of Fine Arts Photo Shoot
Outfits can transform a good photo shoot into a breathtaking one. At the Palace of Fine Arts, your wardrobe choices need to complement the grand neoclassical architecture and natural surroundings — without clashing with the warm tones of the columns and stone. The key is to blend comfort, style, and harmony with the environment while allowing your personality to shine.
Outfit Considerations Based on Shoot Type
Every photo session has a different tone, and your outfit should reflect the emotion you want to express. Here are some guidelines:
| Type of Shoot | Recommended Outfit Styles | Avoid |
| Engagement / Couple | Elegant attire — flowy dresses, formal blazers, heels or dress shoes | Bright neon colors or loud patterns |
| Family Session | Coordinated neutrals, soft layers, comfortable shoes for kids | Overly matchy outfits or logos |
| Graduation / Portrait | Semi-formal, clean lines, solid tones | Distracting prints or oversized accessories |
| Creative / Editorial | Statement pieces, bold contrasts, props that complement architecture | Heavy layers or bulky gear |
Tips:
- Flowy fabrics (like chiffon or satin) photograph beautifully against the wind near the lagoon.
- For men, light suits or casual blazers in muted tones complement the architecture perfectly.
- Avoid logos, busy patterns, or bright reds — they draw attention away from your face and the Palace itself.
“Think of your outfit as part of the scenery — it should enhance, not compete with, the setting.”
— Naomi Chen, Fashion Photographer
Color Palette & Background Harmony
The Palace of Fine Arts features warm beige stone, soft gold tones, and natural green from surrounding trees. Coordinating your wardrobe with this palette makes your photos cohesive and timeless.
Recommended Color Combinations:
| Theme | Color Palette | Best For |
| Romantic & Timeless | Blush, ivory, champagne, navy | Engagements, weddings |
| Earthy & Natural | Olive, beige, rust, cream | Family & lifestyle sessions |
| Modern & Bold | Emerald, burgundy, slate gray | Editorial, creative shoots |
| Minimal & Elegant | Black, white, tan | Fashion or business portraits |
Pro Tip: Coordinate, don’t match. If one person wears a statement color, let others wear neutrals that support it.
Props & Accessories Tips
Props can add dimension to your photos — but moderation is key. The Palace’s dramatic backdrop doesn’t need much enhancement, so subtle touches go a long way.
Smart Prop Ideas:
- Bouquet or flower crown for romantic sessions
- Blanket or picnic basket for family or lifestyle shoots
- Hat, scarf, or book for creative storytelling
- Graduation cap or diploma for milestone photos
Avoid oversized props that block the architecture or distract from the subject. Also, carry a small mirror, blotting paper, and water to stay refreshed — photo shoots here often last over an hour and may involve walking between locations.
Weather & Practical Considerations
San Francisco’s weather is famous for its unpredictability. The Palace’s lagoon area can feel colder than the city center, especially when the wind picks up.
Preparation Checklist:
- Bring a light jacket or wrap, even on sunny days.
- Comfortable shoes are essential — swap them out for dress shoes right before the photo.
- Keep a hairbrush and clips handy; the wind near the dome can be strong.
- Use makeup with setting spray or powder to combat fog and humidity.
If you’re planning multiple looks, consider changing in your car or using a portable changing tent — there are no dedicated dressing areas on-site.
Quick Outfit Inspiration Table
| Look | Description | Photo Vibe |
| Classic Romance | Long flowy gown + navy suit | Elegant, cinematic |
| Modern Minimalist | Monochrome outfit, sleek silhouette | Timeless and chic |
| Boho Natural | Earth-tone maxi dress + sandals | Relaxed and organic |
| Family Harmony | Coordinated soft tones, layered textures | Warm and intimate |
In short, when planning your Palace of Fine Arts photo shoot outfit, think in terms of movement, harmony, and texture. Choose clothing that makes you feel confident and comfortable, but also works naturally within the location’s timeless beauty. When your outfit flows with the architecture — rather than fighting it — the results are effortlessly stunning.
Shot List Ideas & Creative Poses for Your Palace of Fine Arts Photo Shoot

One of the reasons photographers love the Palace of Fine Arts photo shoot experience is how endlessly creative it can be. Every angle — from the rotunda to the lagoon — offers a different texture, light, and feeling. Whether you’re a professional photographer or simply capturing moments with a friend, planning a shot list ensures you don’t miss the most iconic compositions while leaving space for spontaneity.
Classic Iconic Shots
The Palace’s architecture naturally lends itself to timeless, cinematic images. These are the essential shots most photographers aim for, because they highlight the grandeur of the structure and its surroundings.
Must-Have Shots:
- Front view of the rotunda with reflection in the lagoon – the signature Palace photo.
- Wide shot under the dome, capturing the ornate ceiling above your subject.
- Walking shot along the colonnade, framed by columns on both sides.
- Close-up with blurred background of the dome, using a wide aperture (f/2.8–f/4).
- Silhouette shot at sunset, with the structure glowing gold behind the subject.
| Shot Type | Lens Suggestion | Lighting Tip |
| Wide Rotunda | 24–35mm | Shoot during golden hour for warm light |
| Lagoon Reflection | 50mm prime | Use tripod for perfect symmetry |
| Column Walk | 70–200mm | Keep ISO low, aperture around f/3.2 |
| Close-Up | 85mm | Backlight for halo effect |
| Silhouette | Any telephoto | Expose for sky, not the subject |
“If you take only one photo here, make it the lagoon reflection. It captures everything — beauty, symmetry, and serenity.”
— Erica Gomez, Engagement Photographer
Candid & Natural Shots
While posed shots showcase elegance, candid photos reveal emotion. The Palace of Fine Arts offers plenty of open spaces and hidden corners that make authentic interactions easy to capture.
Ideas for Candid Moments:
- Laughing or whispering together while walking under the arches.
- A family holding hands along the path near the pond.
- A subject adjusting their outfit or hair while backlit by sunlight.
- Children running across the green lawn or skipping stones near the lagoon.
Pro Tip: Encourage your subjects to move naturally — walk, spin, or talk. The natural rhythm of movement creates relaxed expressions and believable body language.
Creative Angles & Hidden Spots
If you want to make your Palace of Fine Arts photo shoot stand out, creativity is key. Go beyond the usual postcard shots — explore composition, height, and perspective.
Creative Composition Ideas:
- Low angle shot looking up at the dome to exaggerate its height.
- Frame-within-a-frame using the archways or tree branches.
- Reflections — use puddles or the pond for mirror effects.
- Foreground focus — include leaves, columns, or people in soft focus to add depth.
- Symmetry shots — stand dead center under the dome for balanced geometry.
| Creative Angle | Effect | Best Time |
| Low Angle | Power, drama | Midday |
| Reflection | Serenity, elegance | Morning or evening |
| Foreground Blur | Depth and intimacy | Anytime |
| Center Symmetry | Balance, majesty | Golden hour |
These angles work especially well for editorial or branding shoots, where creativity and visual storytelling matter. Experimentation here can lead to portfolio-worthy results.
Avoiding the Crowd
The Palace is one of San Francisco’s busiest photo spots — particularly for weddings, tourists, and influencers. But with a bit of timing and patience, you can achieve serene, uncluttered shots.
Tips to Minimize Crowds:
- Arrive before 8 AM on weekdays for near-empty scenes.
- Avoid Saturdays between 2–5 PM, the peak for tourist activity.
- If crowds are unavoidable, use shallow depth of field (f/2.8–f/3.5) to blur the background.
- Position your subjects close to columns or foliage to block bystanders naturally.
- For editing, tools like Content-Aware Fill (Photoshop) or Remove Object (Lightroom Mobile) can easily clean up distractions.
“Crowds are part of the challenge — but also part of the charm. The trick is patience. Wait for the 3-second gap, then shoot.”
— Luis Navarro, SF City Photographer
Bonus: Posing Tips for Every Type of Session
| Session Type | Suggested Poses | Mood Created |
| Couple/Engagement | Walk hand-in-hand, forehead touch, spin under dome | Romantic, cinematic |
| Family | Sitting together by lagoon, kids on shoulders, playful chase | Joyful, candid |
| Graduation/Portrait | Crossed arms, looking back over shoulder, toss cap | Empowered, celebratory |
| Editorial/Fashion | Lean on columns, gaze off-camera, dynamic posture | Confident, artistic |
Small prompts from photographers help clients relax and interact naturally. Avoid overly stiff posing — movement brings the Palace’s scale and symmetry to life.
In summary, the Palace of Fine Arts photo shoot offers infinite opportunities for creativity. By balancing classic compositions with candid energy and bold experimentation, you can tell a story that feels authentic yet visually powerful. No two sessions here look alike — and that’s the beauty of it.
Post-Shoot Tips: Editing, Sharing & Memory Keepsakes
Your Palace of Fine Arts photo shoot doesn’t end when you pack up your camera or say goodbye to your photographer. The post-shoot phase — editing, curating, and sharing — is where your photos truly come to life. This step transforms beautiful captures into timeless keepsakes that highlight every detail of the Palace’s architecture and your personal story.
Editing for Architecture and Light
The Palace of Fine Arts has a very distinctive color palette — warm beige stone, soft golden reflections, and subtle greens from the lagoon’s edge. Your editing should enhance these tones rather than overpower them.
Editing Tips:
- Preserve Warmth:
Boost the temperature slightly (+300–500 K) to retain the building’s golden hue, especially during overcast days. - Highlight Texture:
Use clarity and contrast adjustments lightly to emphasize the carved details of the columns and dome. - Balance Shadows:
Open shadows gently to keep the architecture visible without flattening contrast. - Maintain Skin Tones:
Avoid over-saturation; warm stone can reflect orange tones onto skin. Use selective HSL sliders for balance. - Enhance Reflections:
Add subtle dehaze and reduce highlights in lagoon shots to reveal mirror details.
“Editing photos from the Palace is about restraint — the light is already perfect. Let the architecture speak for itself.”
— Nadia Flores, Professional Retoucher
Quick Lightroom Setting Guide
| Adjustment | Suggested Range | Purpose |
| Temp | +300 K to +500 K | Preserve warmth |
| Contrast | +10 – +20 | Add definition |
| Shadows | +20 – +40 | Reveal detail |
| Clarity | +5 – +15 | Subtle texture |
| Vibrance | +10 – +25 | Natural pop of color |
Exporting and Sharing Your Photos
Once your images are polished, think about how and where you’ll share them. The Palace’s striking visuals are ideal for both digital and print formats.
For Web and Social Media:
- Export at 2048 px long edge, 72 dpi — optimized for platforms like Instagram or Pinterest.
- Add descriptive captions using SEO keywords such as “Palace of Fine Arts engagement photos” or “San Francisco portrait session.”
- Include location tags like #PalaceOfFineArts, #SanFranciscoPhotography, or #BayAreaPhotographer for discoverability.
- Watermark discreetly in a lower corner if you’re sharing professional work.
For Printing or Framing:
- Export at 300 dpi, full resolution.
- Consider printing on archival matte or lustre paper to bring out warm tones without glare.
- Use white or light wood frames that complement the neutral palette of the Palace’s architecture.
Tip: Always keep both the RAW and edited files — you may want to revisit them later with new techniques or styles.
Turning Your Shoot Into Keepsakes
A Palace of Fine Arts photo shoot is often tied to milestones — engagements, anniversaries, graduations, or family gatherings. Don’t let those memories live only on screens.
Creative Keepsake Ideas:
- Fine-Art Albums: High-quality lay-flat albums that preserve prints for decades.
- Canvas or Metal Prints: Showcase a wide shot of the dome or lagoon reflection in your home.
- Mini Photo Boxes: Perfect gifts for parents or friends.
- Digital Slideshows: Add music and share privately with loved ones.
- Save-the-Date or Holiday Cards: Use one of your favorite shots to create a personal announcement.
Case Study:
A San Francisco couple printed their engagement photos from the Palace on acrylic panels and displayed them at their wedding reception. The golden tones of the architecture blended seamlessly with the event’s décor, earning compliments from guests and even their photographer.
| Product | Best Use | Longevity |
| Fine-Art Album | Wedding or family memories | 50+ years |
| Canvas Print | Home décor | 20–30 years |
| Digital Slideshow | Sharing online | Indefinite |
| Holiday Card | Seasonal use | Short-term but impactful |
Preserving Your Files Safely
Digital files are precious — and losing them can be devastating. Back up your Palace photo shoot images in three different ways:
- Local Storage: External hard drive (at least 1 TB).
- Cloud Backup: Google Drive, Dropbox, or iCloud for redundancy.
- Physical Backup: USB or SSD kept in a safe place.
Rule of Three: If a photo exists in only one place, it doesn’t really exist.
Final Touch: Tell the Story
Your Palace of Fine Arts photo shoot is more than a collection of beautiful images — it’s part of your story. Share a short caption, blog post, or behind-the-scenes video explaining why this place mattered to you. Personal storytelling not only enhances engagement on social media but also deepens emotional connection with your audience.
“People don’t just fall in love with your photos — they fall in love with the story behind them.”
— Elena Cruz, Storytelling Coach for Photographers
In short, post-production and presentation are where your artistry shines. The Palace of Fine Arts already provides the drama — your editing, sharing, and preservation choices ensure that beauty endures long after the camera is put away.
FAQs: Everything You Might Ask About a Palace of Fine Arts Photo Shoot
Planning your Palace of Fine Arts photo shoot can raise a lot of questions — from logistics and permits to style choices and weather conditions. Below are some of the most frequently asked questions, complete with detailed answers to make your session stress-free and memorable.
1. Do I need a permit for a Palace of Fine Arts photo shoot?
Yes — sometimes.
If your session involves professional equipment, tripods, lighting gear, or commercial intent, you’ll likely need a San Francisco Recreation and Parks Photography Permit.
Personal or casual photo shoots (like engagement or family portraits with handheld cameras) typically do not require a permit, as long as you don’t obstruct pathways or use props that attract large crowds.
| Shoot Type | Permit Needed? | Approx. Cost |
| Casual Portraits | No | Free |
| Engagements/Pro Shoots | Usually | $150–$200 |
| Commercial/Film Work | Yes | $400+ |
Tip: Always confirm with the SF Recreation & Parks Department a few weeks before your scheduled shoot to avoid unexpected interruptions.
2. What are the best times for photos at the Palace of Fine Arts?
Lighting can make or break your photos. The Palace’s soft golden tones shine during golden hour — shortly after sunrise or before sunset.
Best Times of Day:
- Morning (7–9 AM): Soft, diffused light, minimal crowds.
- Late Afternoon (4–6 PM): Warm glow and reflective lagoon.
- Evening Blue Hour: Magical light on the dome and columns.
Avoid: Midday (11 AM – 2 PM) — harsh light and heavy tourist traffic.
3. Can I bring props, pets, or drones?
- Props: Small, non-obstructive props like flowers, hats, or picnic blankets are fine. Avoid large furniture or balloons (which are restricted in city parks).
- Pets: Dogs are welcome on-leash! Just remember to bring waste bags and water.
- Drones: Drone photography is not allowed without a special permit due to city and FAA restrictions.
4. What should I wear for a Palace of Fine Arts photo shoot?
Your outfit should complement — not compete with — the architecture.
Recommended Colors:
- Neutrals: beige, ivory, camel, blush, navy.
- Earth tones: olive, rust, terracotta, muted pastels.
Avoid: Bright neons or overly patterned outfits that clash with the warm stone background.
Style Tips:
- Flowing dresses photograph beautifully near the lagoon.
- Suits or fitted attire add elegance under the rotunda.
- Comfortable shoes are a must — there’s lots of walking!
| Style Type | Recommended Look | Why It Works |
| Romantic | Maxi dresses, soft fabrics | Matches classical tone |
| Modern | Blazer, monochrome sets | Contrasts architecture |
| Casual | Jeans, linen shirts | Natural and timeless |
5. Is parking easy at the Palace of Fine Arts?
Parking is available but limited. There’s a small lot right beside the monument, plus additional street parking along Lyon Street and Baker Street. On weekends, spots fill quickly — arrive early or consider using rideshare services.
Pro Tip: If you’re carrying gear, drop off near the rotunda entrance before parking — it saves energy and time.
6. What happens if it rains?
San Francisco weather can be unpredictable. The Palace remains stunning even on cloudy days — in fact, overcast skies provide perfect soft lighting for portraits.
If rain is heavy:
- Bring clear umbrellas (they photograph beautifully).
- Take advantage of the covered colonnade for shelter and moody shots.
- Always check forecasts 24 hours before your shoot.
7. Are there restrooms or changing areas nearby?
Yes. Public restrooms are available near the Palace of Fine Arts Theatre (behind the rotunda). However, they’re basic — for outfit changes, many photographers use pop-up changing tents or nearby Presidio restrooms (about 5 minutes away).
8. How long should a photo shoot last?
Most sessions last 60–90 minutes, which covers:
- Lagoon and reflection shots
- Rotunda and columns
- Close-ups and candid moments
- Outfit or location changes
For engagement or family sessions, 2 hours is ideal to explore multiple backdrops at a relaxed pace.
9. What other nearby locations can I combine with my shoot?
If you want to expand your session, several scenic spots are just minutes away:
| Nearby Location | Distance | Best For |
| Crissy Field | 5 min drive | Golden Gate Bridge views |
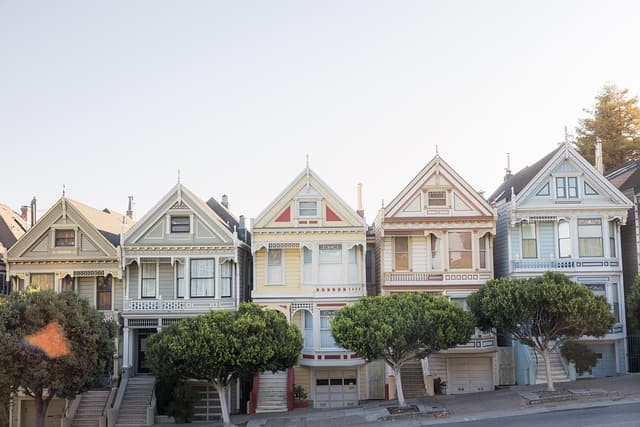
| Lyon Street Steps | 7 min walk | Elegant cityscapes |
| Presidio Woodline | 10 min drive | Natural forest feel |
| Baker Beach | 12 min drive | Beachfront golden hour shots |
Combining the Palace with another San Francisco landmark creates a diverse photo gallery — perfect for engagement or branding shoots.
10. Is the Palace of Fine Arts open at night?
Yes — it’s open to the public 24 hours, and the lighting after dark is breathtaking. The dome glows gold against the night sky, creating dramatic contrast for silhouette or long-exposure shots.
Just remember:
- Bring a tripod for stability.
- Keep ISO low (under 800) to reduce noise.
- Be mindful of safety, as fewer visitors are around late at night.
Final Takeaway
A Palace of Fine Arts photo shoot is more than just a session — it’s a creative experience framed by history, architecture, and emotion. Whether you’re a photographer, couple, or traveler, this location provides a timeless backdrop that never goes out of style.
“Every frame you capture here tells a story — not just of beauty, but of belonging to San Francisco’s living art.”
✅ Conclusion
From understanding the best lighting and angles to editing and sharing your memories, planning your Palace of Fine Arts photo shoot carefully ensures that your photos will stand the test of time. The combination of classical architecture, natural light, and urban serenity makes this destination a treasure for photographers and dreamers alike.

