
A trail camera mount is one of the most important tools for anyone serious about wildlife observation, hunting, or outdoor monitoring. While trail cameras themselves are designed to capture images and videos of animals in their natural habitat, the mount determines how effectively your camera performs. A poorly positioned camera can result in blurry footage, missed wildlife sightings, or even damage to your device from weather and animals.
The right trail camera mount ensures stability, optimal angle, and longevity of your camera, making it a must-have for hunters, wildlife photographers, and outdoor enthusiasts alike. In this comprehensive guide, we’ll cover everything you need to know about trail camera mounts, including the different types, installation tips, maintenance, and tricks to get the best wildlife photos. By the end, you’ll have all the knowledge necessary to select and use the best trail camera mount for your needs.
Why This Guide Matters:
- Understand the different trail camera mounting options.
- Learn how to position your camera for the best results.
- Avoid common mistakes that can cost time and money.
- Ensure the safety and longevity of your trail camera.
Whether you are a beginner trying to set up your first wildlife camera or a seasoned hunter optimizing your setup, understanding trail camera mounts is crucial for capturing high-quality, consistent footage.
What is a Trail Camera Mount?
A trail camera mount is a device or accessory that secures your trail camera in place, ensuring it remains stable and positioned correctly to capture wildlife activity. While it might seem simple at first glance, the mount plays a critical role in the effectiveness of your camera setup. Without a proper mount, even the most advanced trail camera can fail to capture clear images or videos.
Trail camera mounts come in various forms, designed to adapt to different environments and camera models. The main purpose is to provide stability, versatility, and security. For instance, a camera mounted on a wobbly tree branch can result in shaky images, trigger false motion alerts, or miss key wildlife movements entirely. Conversely, a stable mount allows for precise angle adjustments, better motion detection, and longer battery life because the camera doesn’t expend extra energy compensating for movement.
Key Benefits of a Trail Camera Mount:
- Stability: Keeps the camera secure in windy conditions or when animals brush past it.
- Optimal Placement: Ensures the camera is at the ideal height and angle for your target species.
- Protection: Reduces the risk of theft, accidental falls, or environmental damage.
- Consistency: Maintains the same field of view for accurate tracking over time.
Variations of Trail Camera Mounts:
- Trail Camera Brackets: Designed for structured mounting, such as on posts or walls.
- Wildlife Camera Mounts: Typically portable and lightweight for moving between locations.
- Camera Mounting Solutions: General term for all tools and accessories used to position a trail camera.
Understanding what a trail camera mount does and why it is important is the foundation for choosing the right type and setup. Later sections will break down the types of mounts available and how to use them effectively.
Why You Need a Trail Camera Mount
Using a trail camera mount is not just a convenience—it’s essential for capturing high-quality wildlife footage and protecting your investment. Many beginners make the mistake of placing their trail cameras on uneven surfaces, leaning them against trees, or even leaving them on the ground. While this might seem sufficient, it drastically reduces the effectiveness of the camera and can lead to poor results.
Here are the main reasons why a trail camera mount is necessary:
1. Stability in All Conditions
A mount keeps your camera steady even in strong winds, heavy rain, or when animals brush past it. Stability is crucial for:
- Preventing blurry photos or videos.
- Avoiding false motion alerts, which can fill up your SD card unnecessarily.
- Maintaining a consistent field of view over weeks or months.
2. Optimal Positioning for Wildlife
The position of your camera significantly affects what you capture. With a proper mount, you can:
- Set your camera at the ideal height for deer, raccoons, or other target animals.
- Adjust the angle for the best coverage of trails, feeders, or clearings.
- Avoid obstructions like branches, tall grass, or reflective surfaces that can distort images.
3. Security Against Theft or Damage
A trail camera left unsecured is vulnerable to theft or accidental damage. Using a mount with:
- Locking mechanisms or secure straps can deter thieves.
- Durable materials can protect against wildlife interference or falling.
- Camouflage mounting helps your camera blend into the environment, reducing the chance of being noticed.
4. Longevity and Maintenance
By reducing movement and exposure to harsh conditions, a mount extends the life of your camera. A well-mounted camera:
- Uses batteries more efficiently because it doesn’t need to reorient after moving.
- Reduces wear and tear from knocks, drops, or vibrations.
- Allows for easier access for maintenance, like changing batteries or SD cards.
Case Study:
A wildlife photographer in Michigan found that after switching from leaning cameras against trees to using adjustable strap mounts, their capture rate increased by 40%, and the number of blurred images dropped by over 70%. This shows how critical proper mounting can be for results.
Types of Trail Camera Mounts
Choosing the right trail camera mount depends on your environment, the type of wildlife you’re monitoring, and whether you need a permanent or portable setup. There are several types of mounts, each with unique advantages and drawbacks. Understanding these will help you select the best option for your specific needs.
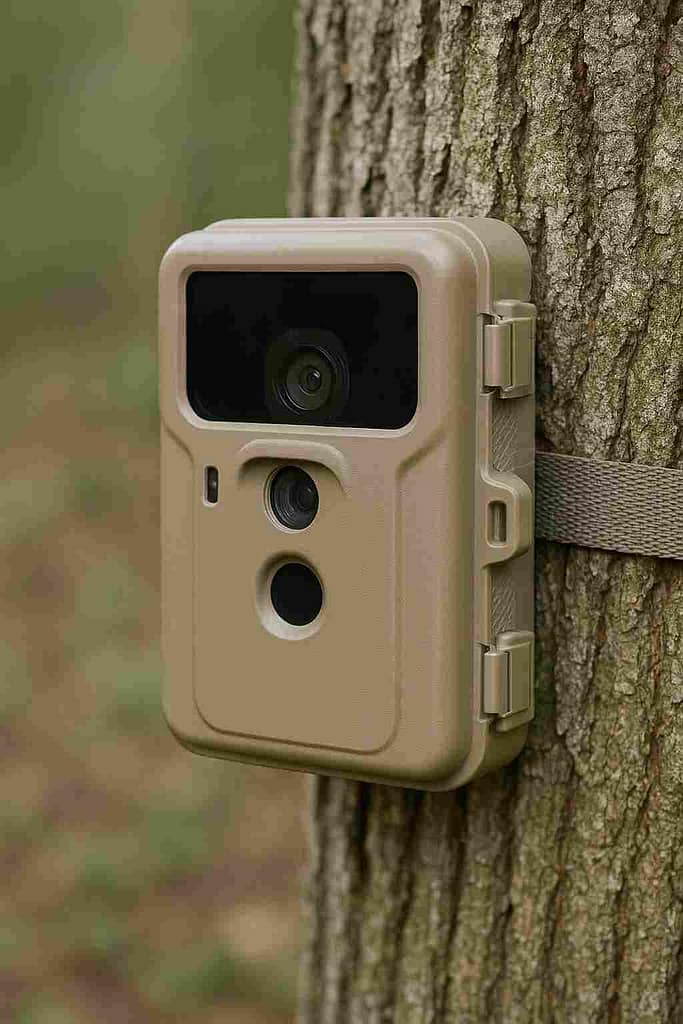
Tree Strap Mounts
Tree strap mounts are the most common type of trail camera mount, especially in forested areas. They wrap around a tree trunk and hold your camera securely in place.
Advantages:
- Easy to install and remove.
- No tools required for setup.
- Adjustable to fit most tree diameters.
Disadvantages:
- Can shift slightly in strong winds if not tightened properly.
- May leave marks on tree bark over long-term use.
Tip: Use a high-quality, weather-resistant strap for long-term durability.
Pole and Post Mounts
These mounts are ideal for open areas where trees are sparse. You can attach your trail camera to metal or wooden posts using brackets.
Advantages:
- Provides flexibility for height and angle adjustment.
- Stable in open areas with little natural support.
- Can be permanent or portable.
Disadvantages:
- Requires drilling or specialized brackets for permanent installation.
- May need additional support in windy conditions.
Tripod Mounts
Tripods offer a portable solution, perfect for temporary setups or when testing locations.
Advantages:
- Easy to move and adjust.
- Can be set on uneven ground.
- Ideal for short-term wildlife studies.
Disadvantages:
- Less secure than tree or post mounts for long-term setups.
- Can be knocked over by animals or wind if not weighted properly.
Wall and Fence Mounts
If you’re monitoring your backyard or private property, wall and fence mounts are useful for attaching cameras to man-made structures.
Advantages:
- Keeps cameras out of reach of wildlife.
- Easy to install on fences or posts.
- Good for urban or suburban wildlife observation.
Disadvantages:
- Limited flexibility for angle adjustments.
- May require drilling or screws, which can damage surfaces.
Magnetic Mounts
Magnetic mounts allow cameras to attach to metal surfaces like posts, feeders, or sheds.
Advantages:
- Quick setup and removal.
- No straps, screws, or drilling required.
- Portable and lightweight.
Disadvantages:
- Only works on ferrous metal surfaces.
- Can be less stable in windy conditions or with heavy cameras.
Quick Comparison Table of Trail Camera Mounts:
| Mount Type | Best For | Pros | Cons |
| Tree Strap | Forests, trees | Easy install, adjustable | Can shift, may mark trees |
| Pole/Post | Open fields, sparse areas | Stable, adjustable height | May require brackets/drilling |
| Tripod | Temporary setups | Portable, uneven ground | Less stable, can tip over |
| Wall/Fence | Backyards, urban areas | Out of reach, easy install | Limited angles, needs screws |
| Magnetic | Metal surfaces | Quick setup, portable | Only on metal, less stable |
How to Choose the Best Trail Camera Mount
Selecting the best trail camera mount can make all the difference between capturing incredible wildlife footage and missing out on key moments. With so many options available, it’s important to understand what factors truly matter. The goal is to balance stability, flexibility, and compatibility so your camera performs reliably in any condition.
Below are the most important things to consider when choosing a trail camera mount that suits your environment and purpose.
1. Consider Your Environment
The location where you plan to install your camera greatly influences the type of mount you should use.
- Forested Areas: Use tree strap mounts or screw-in mounts for quick and easy attachment to trees.
- Open Fields: Post or tripod mounts are ideal for areas without trees.
- Backyard or Urban Settings: Choose wall or fence mounts for security and convenience.
- Wet or Marshy Terrain: Opt for corrosion-resistant mounts with waterproof coatings.
Expert Tip: Always test your camera’s view after installation. Walk in front of it to ensure the sensor captures movement at the correct angle and distance.
2. Weight and Compatibility
Not all mounts are universal. Ensure that your trail camera mount can support the weight and design of your specific camera model.
- Check Manufacturer Compatibility: Some mounts are designed specifically for certain camera brands (e.g., Bushnell, Browning, Spypoint).
- Weight Capacity: Heavier cameras require sturdier mounts to prevent sagging or slippage.
- Attachment Type: Verify whether your camera uses a ¼-inch threaded insert, strap slot, or custom mount adapter.
Pro Insight: Most modern trail cameras use a standard ¼-inch thread, the same as typical camera tripods — making it easier to find compatible mounts.
3. Durability and Weather Resistance
Your camera mount will face harsh outdoor elements — rain, snow, UV rays, and extreme temperatures.
- Look for powder-coated steel, aluminum, or reinforced plastic for long-term durability.
- Avoid mounts made of untreated metal that can rust.
- Check for anti-slip or locking mechanisms to prevent movement after setup.
Fact: According to field tests by Outdoor Life, stainless steel mounts lasted 3x longer in humid climates than standard metal brackets.
4. Adjustability and Flexibility
Being able to fine-tune your camera’s angle can dramatically improve the quality of your captures.
- Choose mounts with ball joints or swivel heads for 360° adjustment.
- Adjustable arms allow for better alignment with trails or feeding areas.
- For long-term setups, lockable joints help maintain your camera’s position.
Example Setup:
Hunters monitoring deer trails often angle cameras slightly downward at 3 to 4 feet high, aiming across rather than directly at the trail for better motion detection.
5. Ease of Installation and Portability
If you frequently move your cameras, portability becomes a key factor.
- Tree straps and tripods are easy to relocate.
- Screw-in or post mounts are better for long-term installations.
- Quick-release mounts allow you to detach the camera without removing the entire mount.
A well-designed mount should take less than 5 minutes to install and require minimal tools.
6. Security Features
Unfortunately, trail cameras can attract unwanted attention from both wildlife and humans. A secure mount helps deter theft and tampering.
- Choose mounts that support lock cables or padlock attachments.
- Use camouflage finishes to blend into the environment.
- Consider anti-theft boxes for high-value cameras.
Pro Tip: Position your trail camera above eye level (7–10 feet) and angle it downward. This reduces visibility to humans and improves your coverage area.
Summary Table: Key Features to Look for
| Feature | Why It Matters | Recommended Type |
| Environment Fit | Stability in your terrain | Tree Strap, Tripod, Post Mount |
| Compatibility | Ensures proper attachment | Universal ¼-inch thread |
| Durability | Withstands weather & time | Steel, Aluminum |
| Adjustability | Better positioning | Ball joint or swivel mount |
| Security | Prevents theft or damage | Lockable, Camouflaged |
A high-quality trail camera mount isn’t just about holding your camera — it’s about maximizing your results. When chosen carefully, the right mount helps you collect consistent, clear, and meaningful data over long periods.
Step-by-Step Guide: How to Mount a Trail Camera
Properly mounting your trail camera is just as important as selecting the right mount. Even the best camera can fail if it’s positioned incorrectly or installed haphazardly. Follow this detailed step-by-step guide to ensure optimal performance and reliable wildlife footage.
Step 1 – Choose the Right Location
Selecting the right location is crucial for capturing wildlife effectively:
- Identify Trails or Feeders: Animals frequently travel along natural trails or visit feeding areas. Position your camera along these paths.
- Avoid Obstructions: Ensure no branches, leaves, or tall grass block the camera’s field of view.
- Consider Sunlight: Avoid pointing your camera directly toward the rising or setting sun, which can cause glare or false triggers.
- Height Matters: For deer, a height of 3–4 feet is ideal. For smaller wildlife like raccoons or foxes, 2–3 feet works best.
Pro Tip: Walk the trail yourself and observe where animals frequently pass. Use this knowledge to determine the best angle and distance for your camera.
Step 2 – Mounting on Trees
Tree strap mounts are among the easiest and most common ways to secure a trail camera:
- Wrap the strap around a sturdy tree trunk.
- Insert the camera through the strap or attach via the mount’s bracket.
- Adjust the camera angle slightly downward to capture motion across the trail rather than directly toward it.
- Tighten the strap firmly to prevent wobbling but avoid damaging the tree.
Tip: For added stability, choose trees with a diameter of 6 inches or larger, and use a non-slip strap.
Step 3 – Mounting on Poles or Posts
Pole or post mounts work well in open areas without trees:
- Secure the mounting bracket to the pole using screws or adjustable clamps.
- Attach the camera to the bracket, ensuring the lens points in the desired direction.
- For taller posts, use a ladder and a safety harness if necessary.
- Test stability by gently shaking the pole — the camera should remain steady.
Fact: Post-mounted cameras can be adjusted seasonally to follow animal movements or changes in vegetation.
Step 4 – Using Tripods and Magnetic Mounts
Tripods and magnetic mounts are perfect for temporary or portable setups:
- Tripod Mounts: Place the tripod on level ground and secure the camera using the tripod’s threaded attachment. Adjust the legs and angle to capture the desired field of view.
- Magnetic Mounts: Attach the camera to any ferrous metal surface. Ensure the magnet is strong enough to support the camera’s weight and angle it slightly downward.
Tip: Always check that the mount is stable before leaving it unattended, especially in windy areas.
Step 5 – Securing Your Camera Against Theft
Protecting your camera from theft or tampering is essential:
- Use security cables or lock boxes when possible.
- Position cameras slightly above eye level to reduce visibility.
- Camouflage the camera and mount using natural materials or commercial covers.
- Avoid placing cameras too close to roads or heavily trafficked areas.
Pro Insight: Combining a well-mounted camera with a lock cable can prevent both human and animal interference, ensuring months of uninterrupted wildlife monitoring.
Quick Checklist for Mounting a Trail Camera:
- Choose a high-traffic wildlife area.
- Avoid obstructions and glare.
- Select an appropriate mount (tree strap, pole, tripod, etc.).
- Adjust the camera angle slightly downward.
- Ensure stability and security.
- Test by walking past the field of view to confirm motion detection.
Mounting a trail camera properly is a blend of science and art. Proper placement, stability, and security ensure that your camera captures clear, meaningful footage for weeks or even months.
Trail Camera Mounting Tips for Better Wildlife Photos
Even with the best trail camera mount, improper placement or settings can result in missed shots or poor-quality footage. These tips focus on maximizing your camera’s performance and capturing clearer, more consistent wildlife photos.
1. Optimize Camera Height and Angle
The height and angle of your camera significantly impact what it captures:
- Deer and Large Mammals: Mount at 3–4 feet high, angled slightly downward.
- Small Animals (Raccoons, Foxes, Rabbits): Mount at 2–3 feet high for optimal detection.
- Birds or Overhead Movement: Consider elevated positions or angled mounts on branches.
Pro Tip: Aim the camera slightly across the trail rather than directly down it. This allows motion sensors to detect side-to-side movement more effectively, triggering the camera earlier.
2. Avoid False Triggers
Unnecessary photos waste battery life and memory space. Reduce false triggers by:
- Keeping branches, tall grass, and foliage out of the motion sensor’s path.
- Mounting in a stable, non-wobbly location.
- Avoiding areas with constant sunlight reflection or shadows moving across the lens.
3. Camouflage Your Camera and Mount
Wild animals can notice unnatural objects, and humans can steal unsecured cameras:
- Use camo tape or covers to blend the camera and mount with the surroundings.
- Mount behind natural obstacles like tree trunks or bushes without blocking the field of view.
- For magnetic or post mounts, consider painting or camo coating to reduce visibility.
4. Seasonal Adjustments
Wildlife behavior changes with seasons, so your camera mount may need adjustments:
- Spring/Summer: Foliage may obstruct the lens; trim branches or reposition slightly.
- Fall/Winter: Snow or fallen leaves may block motion sensors; ensure proper clearance.
- Migration Patterns: Move cameras according to changing animal routes.
5. Maintain Clear Lines of Sight
Even with the right mount and height:
- Keep the lens free from dirt, spider webs, or condensation.
- Clear obstructions around the mounting area periodically.
- Consider adding a small hood or rain shield to protect the lens from weather.
6. Test and Adjust Regularly
The best way to optimize your setup is by testing:
- Walk past the camera to ensure it triggers correctly and captures the desired field of view.
- Review sample images for angle, lighting, and coverage.
- Make small adjustments as necessary to improve capture rates.
Quick Summary Table: Tips for Better Wildlife Photos
| Tip | Why It Matters | Action |
| Correct Height & Angle | Ensures motion detection & clear shots | Deer: 3–4 ft, Small Animals: 2–3 ft |
| Avoid False Triggers | Saves battery & memory | Clear obstructions, stable mount |
| Camouflage | Prevents detection by animals & humans | Use tape, covers, natural obstacles |
| Seasonal Adjustments | Accounts for foliage & behavior changes | Reposition cameras as needed |
| Clear Lines of Sight | Maintains clarity in photos | Clean lens, trim branches |
| Test Regularly | Confirms correct setup | Walk past camera, review images |
By following these mounting tips, your trail camera can capture high-quality, consistent footage that accurately reflects wildlife activity in your area.
Common Mistakes When Using Trail Camera Mounts
Even experienced wildlife photographers and hunters can make mistakes when mounting their trail cameras. These errors can result in missed sightings, poor-quality photos, or even damage to your equipment. Understanding these common pitfalls will help you avoid them and make the most of your trail camera mount.
1. Mounting Too Low or Too High
- Placing your camera at the wrong height can reduce motion detection accuracy and miss the target animals.
- Too low: Small animals trigger the camera, but deer or larger wildlife may pass undetected.
- Too high: Smaller animals may be missed, and motion sensors may not detect movement effectively.
- Solution: Adjust height based on the wildlife you’re monitoring (Deer: 3–4 ft, Small animals: 2–3 ft).
2. Using Incompatible Mounts
- Not all mounts work with every camera. For example, a magnetic mount won’t work on a non-metal post.
- Using mounts that can’t support the camera’s weight may lead to slippage or falls.
- Solution: Check the manufacturer’s recommendations and ensure compatibility with your camera model.
3. Ignoring Stability in Windy Conditions
- A mount that wobbles in the wind can cause blurry images, false triggers, and uneven footage.
- Lightweight or poorly secured mounts are especially vulnerable.
- Solution: Use sturdy straps, secure bolts, or weighted tripods to maintain stability.
4. Failing to Secure the Camera Against Theft
- Trail cameras left unsecured in visible areas are at risk of theft.
- Wildlife can also knock over poorly secured cameras.
- Solution: Use lock cables, camouflaged mounts, and place cameras slightly above eye level.
5. Overlooking Environmental Factors
- Placing cameras in areas prone to flooding, direct sunlight, or snow accumulation can damage the camera.
- Ignoring seasonal changes in foliage can block motion detection or reduce image quality.
- Solution: Consider weatherproof mounts and make seasonal adjustments to maintain visibility and functionality.
6. Neglecting Regular Checks
- Some users set up a trail camera and forget about it for months.
- Battery depletion, full memory cards, or damaged mounts can lead to lost footage.
- Solution: Schedule routine inspections to check battery life, SD card space, mount stability, and camera lens clarity.
Quick Mistakes Checklist:
- Mounting at wrong height.
- Using incompatible or weak mounts.
- Ignoring wind or environmental impact.
- Leaving cameras unsecured.
- Forgetting seasonal adjustments.
- Neglecting routine checks.
Avoiding these common mistakes ensures that your trail camera setup remains effective, reliable, and produces high-quality wildlife images consistently.
Trail Camera Mount Accessories
Enhancing your trail camera mount with the right accessories can improve stability, security, and overall performance. Whether you’re a hunter, wildlife photographer, or nature enthusiast, these accessories help you get the most out of your camera setup.
1. Extension Arms and Brackets
- Allow you to position the camera further from the tree, post, or structure.
- Useful for avoiding obstructions like branches or foliage.
- Provide flexibility for adjusting angles without moving the entire mount.
Example: A hunter using a 12-inch extension arm captured clearer images of deer without interference from nearby tree branches.
2. Lock Boxes and Security Cables
- Protects your camera from theft or tampering.
- Lock boxes cover the camera, while cables secure it to the tree, pole, or post.
- Some lock boxes are weatherproof, offering extra protection against rain and snow.
Pro Tip: Combining a lock box with camouflage tape significantly reduces the risk of theft while keeping the camera hidden from wildlife.
3. Mounting Adapters
- Convert your camera mount for use with different types of mounts (tripods, magnetic mounts, or wall brackets).
- Ensure compatibility across multiple cameras or setups.
- Ideal for people who rotate cameras between locations or use multiple mounts.
4. Camouflage Covers and Wraps
- Helps blend the camera and mount with natural surroundings.
- Prevents animals from noticing the camera, reducing interference.
- Protects against weather damage and UV exposure.
Fact: Studies show that camouflaged trail cameras are 50% less likely to be disturbed by curious animals compared to non-camouflaged cameras.
5. Anti-Vibration Pads
- Reduce wobbling caused by wind or animal contact.
- Improve image clarity and reduce false triggers from motion sensors.
- Simple rubber or foam pads can be placed between the mount and camera or between the mount and tree/post.
Quick Accessories Checklist
| Accessory Type | Purpose | Benefit |
| Extension Arms | Adjust camera distance & angle | Clearer images, avoid obstructions |
| Lock Boxes & Cables | Theft & tampering protection | Security & peace of mind |
| Mounting Adapters | Compatibility with multiple mounts | Flexibility for different cameras |
| Camouflage Wraps | Blend with surroundings | Less disturbance from animals |
| Anti-Vibration Pads | Reduce wobbling | Sharper images & fewer false triggers |
Using these accessories in combination with a sturdy trail camera mount ensures a reliable setup that captures consistent, high-quality wildlife footage.
Maintaining and Caring for Your Trail Camera Mount
A well-maintained trail camera mount ensures long-term performance, stability, and reliable wildlife footage. Neglecting maintenance can lead to rust, loosened mounts, or even lost cameras. Here’s a comprehensive guide to keeping your mounts in top condition.
1. Regular Inspections
- Check mounts periodically for wear, rust, or loose screws.
- Inspect straps, brackets, and magnetic surfaces for damage or stretching.
- Tighten all bolts and fasteners to prevent wobbling or accidental falls.
Pro Tip: Inspect cameras at least once a month during active seasons and after extreme weather events.
2. Cleaning Your Mounts
- Remove dirt, sap, and debris from straps and brackets.
- Wipe metal parts to prevent rust or corrosion.
- Use mild soap and water for plastic components; avoid harsh chemicals that could degrade the mount.
3. Weatherproofing and Protection
- Apply rust-proof coatings to metal mounts exposed to rain or snow.
- Consider UV-resistant straps or covers to prevent sun damage.
- If possible, remove mounts during severe storms or heavy snowfall to prevent damage.
4. Seasonal Adjustments
- Adjust height and angle as foliage grows in spring or falls in autumn.
- Check for overhanging branches, snow accumulation, or shifting terrain.
- Rotate camera locations periodically to track changing wildlife patterns.
5. Proper Storage During Off-Season
- Remove mounts from trees, poles, or posts and store in a dry, cool location.
- Coil straps neatly to prevent stretching or cracking.
- Store small parts (screws, bolts, adapters) in labeled containers to avoid losing them.
6. Battery and Camera Care While Mounted
- Always check camera batteries when inspecting mounts. Weak batteries can reduce performance even if the mount is perfect.
- Ensure the camera is still securely fastened and not loose due to vibrations or environmental factors.
Maintenance Checklist for Trail Camera Mounts:
| Task | Frequency | Notes |
| Inspect mounts | Monthly | Check for rust, loose bolts, or wear |
| Clean mounts | Seasonal | Remove dirt, debris, and sap |
| Weatherproofing | Annually | Apply rust-proof coating and UV protection |
| Adjust for seasons | Spring/Fall | Trim foliage, check angles |
| Proper off-season storage | End of season | Store mounts and small parts in dry place |
Regular care of your trail camera mount not only extends its life but also ensures consistent, high-quality wildlife footage. A little attention goes a long way toward protecting your investment.
Perfect! Let’s move on to the FAQ section.
Frequently Asked Questions (FAQ) About Trail Camera Mounts
Here are some of the most common questions about trail camera mounts, answered in detail to help both beginners and experienced users make the most of their setups.
Can I use any mount for my trail camera?
Not all mounts are universal. While most modern trail cameras use a standard ¼-inch threaded hole, some cameras may have proprietary mounting systems. Always check your camera’s specifications and ensure the mount is compatible with its weight, size, and attachment type. Using the wrong mount can result in instability, blurry photos, or camera falls.
What is the best height to mount a trail camera?
The optimal height depends on the wildlife you’re monitoring:
- Deer and Large Mammals: 3–4 feet high.
- Small Animals (raccoons, foxes, rabbits): 2–3 feet high.
- Birds or overhead activity: Consider elevated positions, angled downward.
Mounting slightly across the trail rather than directly facing it improves motion detection and results in more consistent captures.
How do I prevent my camera from falling?
- Use sturdy mounts appropriate for your camera’s weight.
- Tighten straps, bolts, or brackets securely.
- Avoid thin or unstable trees, poles, or surfaces.
- For windy areas, consider using anti-vibration pads or weighted mounts.
Are magnetic mounts reliable in outdoor conditions?
Magnetic mounts can be very convenient for metal surfaces but have limitations:
- Only work on ferrous metal surfaces.
- Can be less stable with heavier cameras or strong winds.
- Best used for temporary or portable setups rather than long-term installations.
Tip: Test the magnet strength before leaving the camera unattended for extended periods.
How do I camouflage my trail camera mount?
- Use camo tape, covers, or natural materials like leaves or branches to blend the mount with the environment.
- Avoid blocking the camera’s lens or motion sensor.
- For metal or post mounts, consider painting them in earth tones to reduce visibility.
How often should I check my mounted trail camera?
- Inspect cameras at least once a month during active wildlife seasons.
- After extreme weather events (storms, snow, high winds), check for stability and obstructions.
- Regular checks prevent battery depletion, full SD cards, or loss of footage.
Conclusion
A trail camera mount is far more than a simple accessory—it is the foundation for capturing clear, consistent, and reliable wildlife footage. The right mount ensures your camera remains stable, properly positioned, and protected from environmental factors and theft. From tree strap mounts in forests to tripods in open fields, each mounting option serves a unique purpose, and understanding their strengths and limitations is key to success.
By following the tips and techniques outlined in this guide—such as proper height placement, seasonal adjustments, camouflage, and regular maintenance—you can significantly improve your wildlife photography or hunting monitoring results. Additionally, leveraging accessories like lock boxes, extension arms, and anti-vibration pads enhances both the functionality and longevity of your setup.
Key Takeaways:
- Always choose a mount compatible with your camera and environment.
- Ensure proper stability and angle for optimal motion detection.
- Regularly maintain and inspect mounts to prevent issues.
- Use camouflage and security accessories to protect your equipment.
- Test your setup to maximize capture quality and minimize false triggers.
Investing time and thought into selecting and maintaining the right trail camera mount can turn your outdoor monitoring into a rewarding experience, giving you the best opportunity to observe wildlife in its natural habitat.
With the right mount, accessories, and techniques, your trail camera will become a powerful tool for capturing nature at its finest.

