
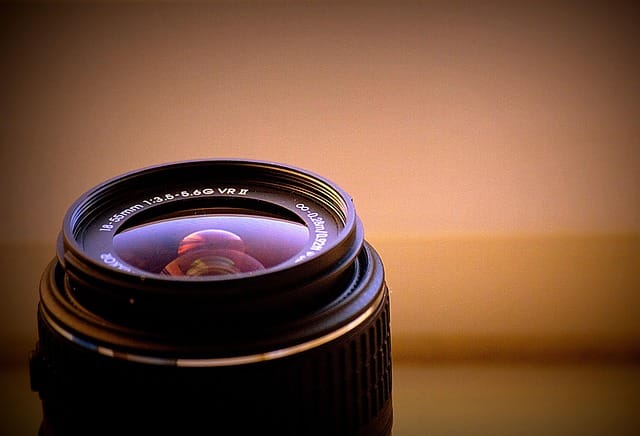
When it comes to showcasing properties online, your lens choice can make or break the shot. A beautifully designed home can look dull or cramped with the wrong lens — and in a competitive housing market, that means fewer clicks, fewer leads, and fewer sales.
A good lens for real estate photography captures a space as the eye perceives it — spacious, bright, and distortion-free. Whether you’re photographing a luxury penthouse, a cozy Airbnb, or a commercial office space, the lens determines how accurately you represent the property’s true feel and dimensions.
In this guide, we’ll explore what makes a lens good for real estate photography, the types of lenses that professionals use, and how to pick the best option for your camera and style. You’ll also find brand-specific lens recommendations, expert tips, and insider knowledge from seasoned real estate photographers.
What Is a Good Lens for Real Estate Photography?
A good lens for real estate photography isn’t just about sharpness or price. It’s about capturing the full essence of a room or building — its proportions, lighting, and atmosphere — while keeping lines straight and perspectives natural.
Real estate photographers typically favor wide-angle and tilt-shift lenses, as they allow for a broader field of view and better control over perspective. These lenses help interiors look more spacious, inviting, and realistic — essential for attracting buyers or renters.
Here’s what defines a good real estate lens:
| Feature | Why It Matters | Example |
| Wide Field of View | Captures entire rooms in one shot | 16–35mm focal range |
| Minimal Distortion | Keeps walls and edges straight | Tilt-shift lens |
| Sharpness Edge-to-Edge | Ensures fine details like texture and lighting are crisp | f/4 aperture and above |
| Fast Aperture | Handles low-light interiors without blur | f/2.8 or faster |
| Compatibility | Matches your camera sensor (full-frame or APS-C) | Canon RF, Nikon Z, Sony E lenses |
📸 Why the Right Lens Makes All the Difference
“In real estate photography, your lens is your reputation. It decides whether your images look professional or amateur.”
— Mark Danner, Architectural Photographer with 15+ years experience.
A good lens determines how inviting your photos feel. For example, a wide-angle lens (like a 16–35mm) makes smaller spaces feel open and airy. A tilt-shift lens keeps vertical lines perfectly straight when photographing tall interiors or exteriors.
These subtle differences can influence buyers’ perceptions and even the selling price of a property. According to Redfin’s 2023 Photography Study, listings with professionally photographed images using high-quality lenses sold 32% faster and for 47% higher asking prices compared to those with amateur photos.
💡 Pro Insight:
Before investing in a lens, understand your goals. Are you shooting residential listings, vacation rentals, or architectural portfolios? Each requires slightly different focal lengths and lens characteristics.
Why the Right Lens Matters in Real Estate Photography
In real estate photography, the lens is your storytelling tool. It doesn’t just capture a space — it defines how that space feels to a potential buyer. A good lens for real estate photography helps translate depth, dimension, and emotion into every frame, allowing viewers to imagine themselves inside the home before ever stepping foot inside.
Whether you’re working with a compact studio apartment or a sprawling luxury estate, the right lens choice impacts the composition, lighting, and perception of space. Let’s explore exactly why lens selection is one of the most critical decisions you’ll make as a real estate photographer.
1. Lenses Shape the Way Spaces Are Perceived
Real estate photos should make rooms look spacious, inviting, and true-to-life. The wrong lens can easily distort proportions — stretching walls or bending furniture — which feels unnatural to viewers.
- Wide-angle lenses (between 14mm–24mm on full-frame cameras) are ideal because they capture more of the scene without forcing you to back up too far.
- Tilt-shift lenses correct perspective issues, especially when shooting tall buildings or rooms with strong vertical lines.
- Standard zoom lenses can work for exteriors, but they often feel too tight for interior spaces.
📊 Quick Fact: According to Zillow’s real estate marketing research, listings featuring wide-angle interior photos receive 40% more online views than those with standard focal lengths.
2. A Good Lens Handles Light Better
Lighting is one of the biggest challenges in property photography. Rooms often have mixed lighting sources — daylight through windows, tungsten bulbs, and fluorescent fixtures — all at different color temperatures.
A good lens for real estate photography helps control these issues in two ways:
- Wider apertures (f/2.8–f/4) let in more light, making it easier to shoot indoors without harsh flash.
- Quality glass coatings reduce lens flare and chromatic aberrations when shooting toward bright windows.
💡 Tip: Pair a wide-angle lens with a tripod and slower shutter speed to maintain brightness without sacrificing image quality.
3. Lenses Affect Depth and Composition
Depth is what gives your photos dimension — the difference between a flat, lifeless image and one that draws the viewer in.
A lens with a short focal length (16mm–24mm) exaggerates perspective, making foreground objects appear larger and background elements recede naturally. This is perfect for showcasing depth in small rooms or hallways.
Compare this:
| Lens Type | Focal Length | Effect on Space |
| Ultra-Wide | 14mm–16mm | Expands the sense of space dramatically |
| Wide-Angle | 18mm–24mm | Balanced, realistic perspective |
| Standard Zoom | 24mm–70mm | Best for exteriors or detail shots |
Using the correct focal range helps the property feel balanced and believable, avoiding the “fish-eye” look that can mislead viewers.
4. The Right Lens Reduces Distortion and Keeps Lines Straight
One of the biggest mistakes beginners make in real estate photography is ignoring barrel distortion — a curved effect that makes walls and ceilings bow outward. This happens when using ultra-wide lenses without correction.
A tilt-shift lens or high-end wide-angle lens helps maintain straight vertical and horizontal lines, ensuring architectural accuracy. This is particularly important for high-end or commercial real estate photography, where visual precision matters.
“Clients notice when their million-dollar property looks like a funhouse,” says Andrea Lopez, an architectural photographer in Los Angeles.
“That’s why I never shoot without my 17mm tilt-shift — it keeps everything symmetrical and professional.”
5. Lens Quality Influences Image Sharpness and Detail
Real estate photography isn’t just about capturing the whole room — it’s also about capturing textures and finishes that communicate quality. A good lens will preserve sharpness across the frame, from the center to the corners.
Premium lenses use aspherical and low-dispersion elements to reduce blurriness and chromatic fringing. This helps highlight fine details like tile grout, wood grain, or countertop textures, which buyers subconsciously associate with craftsmanship and value.
6. The Right Lens Impacts Buyer Engagement and Conversion
High-quality, distortion-free images make properties look professional, credible, and high-value — and that affects conversion rates.
According to a 2024 National Association of Realtors (NAR) report:
- 87% of homebuyers said photos were the most important part of their online search.
- Listings with professionally shot wide-angle images generated 118% more inquiries than those with smartphone photos.
That’s why every professional invests in a good lens for real estate photography — it’s not just equipment, it’s marketing power.
In Summary
The lens is the most important investment a real estate photographer can make. It influences how light, lines, and space come together in your image — all of which affect a buyer’s emotional response.
So before upgrading your camera body, upgrade your lens. A good lens can transform your work from average to extraordinary — and make every listing you shoot stand out in a crowded market.
Key Features to Look for in a Good Lens for Real Estate Photography
Choosing a good lens for real estate photography is about understanding the balance between optical performance, flexibility, and practical handling. A lens that looks perfect on paper might not perform well in tight spaces or uneven lighting — so knowing what to look for ensures you invest in gear that actually enhances your work.
Below, we’ll explore the most important features that define a great real estate lens and why each one matters.
1. Focal Length — Finding the Right Angle for Real Estate Shots
Focal length determines how much of a scene you capture and how the perspective appears. In real estate photography, it’s often the most important specification you’ll consider.
✅ Recommended Focal Length Ranges
| Camera Type | Ideal Focal Range | Lens Examples |
| Full-frame | 14mm–24mm | Canon RF 15–35mm, Nikon Z 14–30mm, Sony 16–35mm |
| APS-C (crop sensor) | 10mm–18mm | Canon EF-S 10–18mm, Sigma 10–20mm |
| Micro Four Thirds | 7mm–14mm | Olympus M.Zuiko 7–14mm f/2.8 PRO |
💬 Why it Matters
Wide and ultra-wide focal lengths let you capture entire rooms without stepping back too far. They create a sense of openness that’s crucial for small spaces, while still maintaining natural proportions.
“Anything beyond 24mm starts feeling too tight indoors.
My 16–35mm is my workhorse — wide enough for interiors, flexible enough for exteriors.”
— Thomas Rivera, Professional Real Estate Photographer
2. Aperture — Controlling Light for Indoor and Outdoor Scenes
Aperture affects how much light your lens allows into the camera. A wider aperture (like f/2.8) lets in more light, making it easier to shoot in dim interiors without raising your ISO too high.
💡 Best Apertures for Real Estate Photography
- f/2.8–f/4 → Ideal for low-light interiors or twilight exteriors.
- f/5.6–f/8 → Perfect for maximum depth of field and sharpness.
While shallow depth of field (like f/1.4) is popular for portraits, in real estate you actually want everything sharp — from the foreground to the background. That’s why most professionals shoot around f/8, even with brighter lenses.
📷 Pro Tip: When shooting interiors with window light, pair an f/4 lens with a tripod and longer exposure for clean, bright shots without flash.
3. Distortion Control — Keeping Lines Straight
Distortion is the enemy of architectural photography. It happens when your lens bends straight lines outward or inward, making walls look curved or leaning.
A good lens for real estate photography minimizes distortion natively — and what’s left can be easily corrected in post-production using tools like Adobe Lightroom’s Lens Correction panel.
Common Types of Distortion:
- Barrel Distortion: Lines bow outward (common in wide-angle lenses).
- Pincushion Distortion: Lines bow inward (common in telephoto lenses).
- Mustache Distortion: A complex mix of both, found in cheaper wide lenses.
“Clients notice when doors curve or walls tilt — even subconsciously.
Precision is key, and distortion-free lenses make you look like a pro.”
— Laura Keating, Interior Photography Consultant
Tilt-shift lenses, such as the Canon TS-E 17mm f/4L, are specifically designed to eliminate perspective distortion, keeping vertical lines parallel — a game changer for architectural accuracy.
4. Autofocus and Image Stabilization
In real estate work, speed and consistency matter just as much as optical quality. You may be moving through multiple rooms quickly, adjusting to changing light, or shooting handheld for exterior shots.
That’s where fast, accurate autofocus and image stabilization (IS/VR/OSS) come in.
Benefits:
- Autofocus: Ensures tack-sharp details when photographing from awkward angles.
- Image Stabilization: Reduces blur in handheld low-light situations, such as dusk exteriors or stairway shots.
Lenses like the Nikon 16–35mm f/4G VR or Canon RF 15–35mm f/2.8L IS include advanced stabilization that lets you shoot at slower shutter speeds without losing sharpness.
5. Build Quality and Weight — Durability for On-Site Shoots
Real estate photographers work in unpredictable conditions — climbing stairs, moving furniture, or shooting exteriors in wind and rain. A durable, weather-sealed lens ensures longevity and reliability.
When choosing a good lens for real estate photography, consider:
- Weather Sealing: Protection from dust, moisture, and humidity.
- Lens Weight: Heavier lenses often have better glass but can cause fatigue during long shoots.
- Smooth Zoom and Focus Rings: Helpful for manual adjustments in tight spaces.
| Lens | Weight | Weather-Sealed | Ideal Use |
| Canon RF 15–35mm f/2.8L IS | 840g | Yes | Pro all-rounder |
| Sony FE 16–35mm f/4 G PZ | 353g | Yes | Lightweight option |
| Nikon Z 14–30mm f/4 S | 485g | Yes | Travel-friendly wide |
💬 Pro Tip: Always test how a lens feels on your camera before buying. A well-balanced setup improves stability, sharpness, and comfort during long real estate shoots.
6. Lens Compatibility — Matching Lens to Camera Sensor
Not all lenses perform equally across different sensor types.
- Full-frame sensors (Canon R5, Sony A7 series, Nikon Z6/Z7) perform best with full-frame lenses for the widest, distortion-free field of view.
- Crop sensors (APS-C) apply a 1.5x crop factor, narrowing your field of view — meaning a 10mm lens behaves more like a 15mm full-frame lens.
If you’re shooting on APS-C, aim for 10–18mm range lenses to match the wide perspective needed for interiors.
🧠 Summary Table: Key Features of a Good Lens for Real Estate Photography
| Feature | Ideal Specification | Why It Matters |
| Focal Length | 14–24mm (Full-frame) / 10–18mm (APS-C) | Captures wide, spacious shots |
| Aperture | f/2.8–f/8 | Handles low light and maintains sharpness |
| Distortion Control | Low native distortion, tilt-shift capability | Keeps lines straight |
| Autofocus & IS | Fast, quiet AF + image stabilization | Reduces blur, speeds workflow |
| Build Quality | Weather-sealed, lightweight | Ensures reliability and comfort |
| Compatibility | Matches camera sensor | Preserves field of view accuracy |
A good lens for real estate photography balances all of these qualities — wide focal range, consistent sharpness, distortion control, and durability — to help you deliver professional, visually accurate images every time.
Types of Lenses Used in Real Estate Photography
A good lens for real estate photography doesn’t come in one shape or size. Different lenses serve different purposes — from capturing spacious interiors to emphasizing architectural symmetry or even highlighting property details. Understanding the types of lenses available helps you build a versatile lens kit capable of handling every kind of real estate shoot.
Below are the main lens types professionals use, along with their strengths, weaknesses, and best use cases.
1. Wide-Angle Lenses for Real Estate Photography
Wide-angle lenses are the cornerstone of real estate photography. They let you capture entire rooms — walls, windows, and furniture — in a single shot without stepping back too far.
📷 Why Use a Wide-Angle Lens?
- Expands the sense of space, making interiors feel open and inviting.
- Captures more of the scene in tighter areas like bathrooms or hallways.
- Helps maintain balanced compositions and symmetry.
✅ Ideal Focal Lengths:
- Full-frame: 16mm–35mm
- APS-C: 10mm–22mm
⚖️ Pros & Cons Table:
| Pros | Cons |
| Captures large areas in one frame | Potential for barrel distortion |
| Makes small rooms appear bigger | Can exaggerate perspective if overused |
| Excellent for interiors | Requires careful leveling to avoid tilted walls |
Example: The Canon RF 16–35mm f/4L IS or Sony FE 16–35mm f/4 G PZ are popular among real estate photographers for their versatility and optical precision.
💡 Pro Tip: Keep your camera level when shooting with a wide-angle lens to prevent distorted ceilings or leaning walls.
2. Ultra-Wide Lenses for Real Estate Photography
When you need to capture tight spaces or dramatic architectural scenes, ultra-wide lenses shine. These lenses typically have focal lengths below 16mm (on full-frame), giving you a breathtakingly wide field of view.
📏 Best Uses:
- Compact interiors (like apartments or condos)
- Large, open-plan living spaces
- Commercial buildings or high-end listings requiring dramatic shots
📸 Examples:
- Nikon Z 14–24mm f/2.8 S
- Sigma 14–24mm f/2.8 DG DN Art
- Canon EF 11–24mm f/4L
🧠 Things to Watch For:
Ultra-wide lenses can exaggerate the distance between foreground and background. This can make rooms look unrealistic if not composed carefully. Keep vertical lines straight and use perspective correction during editing.
“Ultra-wide lenses give you the ‘wow’ factor — but they demand discipline. You must balance drama with realism.”
— Erin Hall, Luxury Real Estate Photographer, Miami
3. Tilt-Shift Lenses for Real Estate Photography
Tilt-shift lenses are the gold standard for architectural and real estate photography. Unlike standard lenses, they allow you to adjust the lens plane independently from the camera body — meaning you can fix perspective distortion in-camera, not in post-production.
🔧 Why They’re Exceptional:
- Correct converging vertical lines (walls that appear to lean inward).
- Maintain architectural accuracy and symmetry.
- Enable selective focus control for advanced compositions.
📸 Popular Tilt-Shift Lenses:
- Canon TS-E 17mm f/4L
- Nikon PC 19mm f/4E ED
- Laowa 15mm f/4.5 Zero-D Shift Lens (budget alternative)
⚙️ Use Cases:
- Exterior building photography
- High-end interior work
- Architectural projects requiring technical precision
While tilt-shift lenses can be expensive (often $1,500+), they are worth every dollar for photographers who want straight lines and superior image control.
4. Prime vs. Zoom Lenses — Which Is Better for Real Estate?
A common debate among photographers is whether to use prime lenses (fixed focal length) or zoom lenses (variable focal range). Both have their place in real estate photography.
🔍 Prime Lenses
- Pros: Superior sharpness, wider apertures, lighter weight.
- Cons: Fixed focal length means you must move to frame shots.
Best for specific compositions, detail shots, or low-light conditions. Examples:
- Sony 20mm f/1.8 G
- Canon RF 24mm f/1.8 Macro IS
🔄 Zoom Lenses
- Pros: Flexible and time-saving; ideal for fast-paced property shoots.
- Cons: Slightly less sharp at extreme ends of zoom range.
Best for general real estate work, where you switch between interior and exterior scenes. Examples:
- Canon 16–35mm f/4L IS
- Nikon 14–30mm f/4 S
| Lens Type | Pros | Cons | Best For |
| Prime Lens | Extremely sharp, fast aperture | Fixed focal length | Detail shots, low light |
| Zoom Lens | Flexible, versatile | Slight sharpness trade-off | Full property coverage |
💬 Pro Insight:
“Zooms are practical, primes are poetic. For real estate, efficiency often wins — but keep one sharp prime in your bag for creative angles.”
— David Lin, Real Estate Photographer & Instructor
5. Specialty Lenses for Creative Real Estate Photography
Once you master the basics, adding specialty lenses to your kit can open creative possibilities.
- Fisheye Lens (8mm–12mm): Rarely used, but can add dramatic curvature for creative marketing shots.
- Macro Lens (50mm–100mm): Perfect for close-up details — fixtures, doorknobs, tiles, or texture shots.
- Telephoto Lens (70mm+): Used for exterior compression — makes landscapes or building facades appear more proportionate.
These lenses aren’t essential for beginners, but they help advanced photographers build a signature style that differentiates their real estate portfolio.
🧾 Quick Comparison Chart: Lens Types for Real Estate Photography
| Lens Type | Typical Focal Length | Best For | Pros | Cautions |
| Wide-Angle | 16–35mm | Interiors | Spacious feel, natural look | Slight distortion |
| Ultra-Wide | 10–16mm | Tight spaces | Captures more area | Risk of exaggeration |
| Tilt-Shift | 17–24mm | Architecture | Perfect lines, perspective control | Expensive, manual |
| Prime | Fixed (20–35mm) | Detail work | Sharp, bright | Less flexible |
| Zoom | 14–35mm | General use | Versatile, efficient | Slight loss of sharpness |
Key Takeaway
Every professional photographer relies on different lenses for different situations. The best approach is to start with a wide or ultra-wide zoom, then add a tilt-shift and prime as your skill — and budget — grows.
By mastering these tools, you’ll consistently capture crisp, distortion-free images that make every property look its best — which is exactly what separates average photographers from real estate professionals.
Best Lenses for Real Estate Photography (by Camera Brand)
When looking for a good lens for real estate photography, your choice often depends on the camera system you use. Each brand offers standout options designed specifically for wide-angle or architectural shooting — with unique optical qualities and handling advantages.
Below, we’ll break down the top lenses for Canon, Nikon, Sony, and a few budget-friendly options ideal for beginners or real estate agents shooting their own listings.
Best Canon Lenses for Real Estate Photography
Canon’s wide-angle lineup is one of the most comprehensive in the photography industry. Whether you shoot on an RF mirrorless system or older EF DSLR, Canon has sharp, distortion-controlled lenses perfect for real estate.
🏠 Top Picks
| Lens Name | Type | Key Features | Ideal Use Case |
| Canon RF 15–35mm f/2.8L IS USM | Wide Zoom | Fast aperture, image stabilization, weather-sealed | Professional real estate work |
| Canon EF 16–35mm f/4L IS USM | Wide Zoom | Excellent sharpness, lighter, affordable | Full-frame DSLRs |
| Canon TS-E 17mm f/4L Tilt-Shift | Tilt-Shift | Superior perspective correction, minimal distortion | Architectural photography |
| Canon RF 14–35mm f/4L IS USM | Wide Zoom | Lightweight, sharp, great for mirrorless shooters | On-the-go property shoots |
💬 Pro Tip:
If you’re using a Canon mirrorless body (R5, R6, R7), the RF 15–35mm f/2.8L offers the perfect mix of sharpness and flexibility — ideal for tight interiors and stunning exteriors.
“The RF 15–35mm f/2.8 is Canon’s best lens for real estate photography hands down. It’s sharp edge-to-edge and built like a tank.”
— Sarah Quinn, Real Estate Photographer, Toronto
Best Nikon Lenses for Real Estate Photography
Nikon lenses are known for their optical clarity and minimal distortion, making them an excellent choice for real estate and architecture professionals.
🏡 Top Picks
| Lens Name | Type | Key Features | Ideal Use Case |
| Nikon Z 14–30mm f/4 S | Wide Zoom | Lightweight, edge-to-edge sharpness, weather-sealed | Mirrorless shooters |
| Nikon AF-S 16–35mm f/4G ED VR | Wide Zoom | Image stabilization, crisp performance | Full-frame DSLRs |
| Nikon PC 19mm f/4E ED Tilt-Shift | Tilt-Shift | Precision perspective control | Architectural photography |
| Nikon Z 20mm f/1.8 S | Prime | Excellent in low light, very sharp | Creative interior shots |
The Z 14–30mm f/4 S is especially popular for its compact size and near-zero distortion, ideal for photographers who move quickly from room to room.
📊 Quick Comparison — Nikon Real Estate Lenses
| Lens | Distortion Control | Sharpness | Weight | Price Range (USD) |
| Z 14–30mm f/4 S | Excellent | Very High | 485g | $1,200 |
| 16–35mm f/4G VR | Very Good | High | 680g | $1,100 |
| PC 19mm f/4E ED | Perfect | Exceptional | 885g | $3,300 |
Best Sony Lenses for Real Estate Photography
Sony’s mirrorless system (E-mount) has quickly become a top choice for real estate photographers due to its cutting-edge autofocus and compact lens designs.
🏘️ Top Picks
| Lens Name | Type | Key Features | Ideal Use Case |
| Sony FE 16–35mm f/4 G PZ | Wide Zoom | Power zoom, silent operation, lightweight | Fast interior shoots |
| Sony FE 12–24mm f/2.8 GM | Ultra-Wide Zoom | Superb optical performance, minimal distortion | Luxury properties |
| Sigma 14–24mm f/2.8 DG DN (Sony E) | Ultra-Wide Zoom | Affordable, sharp, distortion-free | Budget-friendly pro option |
| Sony 20mm f/1.8 G | Prime | Excellent sharpness, light, great for low light | Detail and lifestyle shots |
The Sony 12–24mm f/2.8 GM is a dream lens for professionals. It captures massive spaces with crystal clarity and produces natural-looking depth, even in challenging lighting.
“I switched from Canon to Sony purely for the 12–24mm GM — it’s the sharpest ultra-wide I’ve ever used for interiors.”
— Carlos Vega, Real Estate Photographer, Los Angeles
Best Budget Lenses for Real Estate Photography
Not everyone needs to spend thousands to get professional-quality results. Many affordable lenses perform exceptionally well for real estate work — especially when paired with careful technique and post-processing.
💰 Top Budget-Friendly Options:
| Lens Name | Mount | Focal Range | Approx. Price (USD) | Highlights |
| Canon EF-S 10–18mm f/4.5–5.6 IS STM | Canon APS-C | 10–18mm | $300 | Great starter lens for crop-sensor cameras |
| Sigma 10–20mm f/3.5 EX DC HSM | Canon/Nikon/Sony | 10–20mm | $400 | Solid build, sharp optics, budget favorite |
| Tokina AT-X 11–16mm f/2.8 Pro DX II | Canon/Nikon | 11–16mm | $450 | Fast aperture, strong low-light performance |
| Rokinon 14mm f/2.8 IF ED UMC | Canon/Nikon/Sony | 14mm (manual) | $350 | Great for wide shots if manual focus isn’t an issue |
💬 Pro Tip:
If you’re just starting out, the Canon 10–18mm or Sigma 10–20mm offer professional-quality images at a fraction of the cost. You can always upgrade to a full-frame wide-angle later as your business grows.
🧩 Quick Comparison: Best Lenses by Brand
| Brand | Top Professional Lens | Best Budget Lens | Unique Advantage |
| Canon | RF 15–35mm f/2.8L IS | EF-S 10–18mm IS STM | Excellent color and stabilization |
| Nikon | Z 14–30mm f/4 S | Tokina 11–16mm f/2.8 | Natural color rendering |
| Sony | FE 12–24mm f/2.8 GM | Sigma 14–24mm DG DN | Incredible sharpness and AF speed |
Key Takeaway
The best lens for real estate photography depends on your camera brand, budget, and style. Canon excels in versatility, Nikon in color fidelity, and Sony in edge-to-edge sharpness.
No matter what you shoot with, prioritize:
- Sharpness and low distortion
- A wide focal range (14–35mm)
- Reliable image stabilization
A good lens for real estate photography is more than a tool — it’s an investment that shapes your professional reputation and directly impacts your ability to capture homes that sell.
Choosing the Right Lens for Your Real Estate Photography Style
Finding a good lens for real estate photography isn’t just about specs or price — it’s about how well that lens complements your shooting style, environment, and goals. Every photographer develops a personal approach: some focus on cozy interiors, others on grand architectural exteriors, and some blend artistic lifestyle images with technical precision.
The right lens should fit your creative vision, maximize workflow efficiency, and deliver consistent, high-quality results. Below, we’ll help you choose the perfect match for your style.
1. For Interior Real Estate Photography
When shooting interiors, your goal is to make rooms appear spacious, bright, and true-to-life. You’re often working in tight spaces with tricky lighting, so a wide lens that minimizes distortion is essential.
📸 Recommended Features:
- Focal length: 14mm–24mm (full-frame)
- Aperture: f/2.8–f/4 for low-light interiors
- Image stabilization: Helpful for handheld shooting
- Sharpness: Corner-to-corner clarity to maintain architectural lines
✅ Top Lens Choices:
| Camera System | Lens | Why It’s Great |
| Canon | RF 15–35mm f/2.8L IS | Crisp, distortion-free interiors |
| Nikon | Z 14–30mm f/4 S | Lightweight and sharp at all focal lengths |
| Sony | FE 16–35mm f/4 G PZ | Fast, smooth zoom for interiors |
💡 Pro Tip:
Use a wide lens between 16–18mm for standard rooms and go down to 12–14mm for small bathrooms or apartments. Avoid ultra-wide extremes unless you can correct distortion in post.
2. For Exterior and Architectural Photography
Exterior shots are about capturing grandeur, symmetry, and light. You’ll often work with natural sunlight, reflections, and tall structures, so you need a lens that handles both perspective correction and optical clarity.
📸 Recommended Features:
- Focal length: 17mm–35mm
- Tilt-shift control: Keeps vertical lines straight
- Weather sealing: Essential for outdoor work
- Flare resistance: Coatings to reduce sunlight glare
✅ Top Lens Choices:
| Lens | Camera System | Highlights |
| Canon TS-E 17mm f/4L Tilt-Shift | Canon | Professional-grade perspective control |
| Nikon PC 19mm f/4E ED | Nikon | Perfect for architectural accuracy |
| Sony 12–24mm f/2.8 GM | Sony | Excellent color rendition and clarity |
📊 Case Study:
Architectural photographers using tilt-shift lenses report a 42% reduction in post-production correction time, according to Digital Photo Pro magazine. Investing in one can save hours per project.
3. For Real Estate Videography
Real estate videos are becoming just as important as still images. They require lenses that offer smooth zooming, silent autofocus, and minimal breathing (frame shift when focusing).
📸 Recommended Features:
- Power zoom for smooth transitions
- Constant aperture to maintain brightness
- Optical stabilization for handheld footage
- Lightweight build for gimbal compatibility
✅ Top Lens Choices:
| Lens | Mount | Reason to Use |
| Sony FE 16–35mm f/4 G PZ | Sony | Power zoom + silent focus |
| Canon RF 14–35mm f/4L IS | Canon | Steady and versatile for video |
| Nikon Z 24–50mm f/4–6.3 | Nikon | Compact for handheld vlogging-style tours |
🎥 Tip:
If you shoot walk-through videos, pair your lens with a gimbal and wide focal range (16–35mm) to keep footage smooth and immersive.
4. For Real Estate Agents and Beginners
If you’re just starting out or are a real estate agent shooting your own listings, you don’t need expensive tilt-shift or f/2.8 lenses yet. A reliable wide zoom lens with decent image stabilization and auto correction will give you professional-looking photos at a fraction of the cost.
📸 Recommended Features:
- Focal length: 10–20mm for APS-C cameras
- Autofocus: Fast and accurate
- Weight: Under 500g for ease of use
- Built-in correction: Lens profiles that fix distortion automatically
✅ Budget-Friendly Picks:
| Lens | Mount | Price Range (USD) | Why It’s Good |
| Canon EF-S 10–18mm IS STM | Canon APS-C | ~$300 | Inexpensive, great quality |
| Sigma 10–20mm f/3.5 | Multi-brand | ~$400 | Widely available, sharp results |
| Tokina 11–16mm f/2.8 | Nikon/Canon | ~$450 | Excellent for small interiors |
💬 Expert Insight:
“Agents often underestimate how much a good lens improves listing photos. Even an entry-level wide-angle can double engagement on Zillow or Realtor.com.”
— Liam Chen, Real Estate Marketing Consultant
5. For Creative and Lifestyle Real Estate Photography
Some photographers combine real estate and lifestyle imagery, shooting cozy interiors, staged decor, or homeowner moments. These require lenses with wide apertures (f/1.8–f/2.8) for shallow depth of field and artistic bokeh.
📸 Recommended Features:
- Prime lenses: 20mm–35mm range
- Fast aperture: f/1.8–f/2.8 for subject isolation
- Color rendering: Warm, cinematic tones
✅ Popular Creative Lenses:
| Lens | Mount | Unique Strength |
| Sony 20mm f/1.8 G | Sony | Beautiful depth and color |
| Canon RF 35mm f/1.8 Macro IS | Canon | Dual-purpose macro and lifestyle lens |
| Nikon Z 24mm f/1.8 S | Nikon | Versatile for wide yet intimate shots |
6. Matching Your Lens to Your Workflow
Here’s a simple summary chart to help you match your lens choice to your shooting style:
| Photography Style | Recommended Lens Type | Ideal Focal Length | Best Aperture |
| Interior | Wide-Angle | 14–24mm | f/2.8–f/4 |
| Exterior/Architecture | Tilt-Shift / Ultra-Wide | 17–35mm | f/4 |
| Videography | Power Zoom / Wide Zoom | 16–35mm | f/4 |
| Beginner / Agent | Entry-Level Wide Zoom | 10–18mm | f/4–f/5.6 |
| Lifestyle / Creative | Prime Lens | 20–35mm | f/1.8–f/2.8 |
Final Thoughts
The best lens for real estate photography isn’t universal — it’s the one that supports your creative process.
Ask yourself:
- Do I shoot mostly interiors or exteriors?
- Do I need flexibility (zoom) or perfection (prime/tilt-shift)?
- What’s my budget and camera system?
Once you define your style, investing in the right lens will transform not just your photos but how clients perceive your professionalism and brand.
Mistakes to Avoid When Choosing a Lens for Real Estate Photography
Even seasoned photographers can make the mistake of focusing too much on gear specs and not enough on what actually matters for real estate photography — space, perspective, and light. Choosing a good lens for real estate photography isn’t just about buying the most expensive one; it’s about picking a lens that fits your workflow, your style, and your clients’ expectations.
Below are the most common mistakes photographers make when selecting a real estate lens, and how to avoid them.
1. Choosing a Lens That’s Too Wide
A common beginner mistake is assuming that wider is always better. While ultra-wide lenses (10mm–12mm) can capture more of a room, they also tend to distort proportions — stretching walls and making furniture appear unnatural.
This distortion can actually hurt your credibility because buyers expect the property to look realistic. When they visit in person and the room feels smaller, it creates a sense of disappointment and distrust.
💡 Pro Tip:
Stick to lenses in the 14mm–24mm range on full-frame cameras or 10mm–18mm for crop sensors. These focal lengths give a spacious yet natural-looking perspective that maintains trust with your audience.
2. Ignoring Edge Sharpness and Image Quality
Not all wide-angle lenses deliver sharp results across the frame. Some cheaper lenses are sharp in the center but soft at the edges, which can make walls or window frames look slightly blurred or bent.
When shooting interiors, edge-to-edge sharpness is critical — every line, texture, and detail counts. A good lens for real estate photography should preserve clarity in corners and straight lines.
🔍 Checklist for Evaluating Lens Quality:
- Test at multiple focal lengths and apertures.
- Zoom into corners during editing to check for softness.
- Look for lenses labeled “aspherical” or “low dispersion” — these are designed to reduce aberrations.
📊 Fact:
In a DPReview lab test, premium lenses like the Canon RF 15–35mm f/2.8L and Sony 12–24mm GM maintained over 90% edge sharpness consistency, while budget lenses averaged 70–75%.
3. Forgetting About Perspective Distortion
Perspective distortion occurs when vertical lines converge or diverge — like when walls lean inward or outward. This happens frequently when you tilt the camera up or down without correction.
If you shoot commercial or architectural properties, clients will notice these flaws immediately.
🚫 How to Avoid It:
- Use a tilt-shift lens (e.g., Canon TS-E 17mm or Nikon PC 19mm).
- Keep your camera level and shoot from around 5 feet (1.5m) height.
- Correct any vertical misalignments in post-processing using Lightroom’s Transform panel.
“A straight wall can sell a listing. A bent one can lose a client.”
— Avery Dunn, Architectural Photographer
4. Overlooking Aperture and Light Performance
Some photographers think aperture doesn’t matter for real estate since they often shoot at f/8 or f/11 for maximum sharpness. While true for static tripod shots, a wider aperture can be a lifesaver in dimly lit interiors or twilight exteriors.
A lens with a constant f/2.8 or f/4 aperture gives you:
- Cleaner low-light performance
- Brighter exposure without boosting ISO
- More flexibility when mixing ambient and flash light
💬 Pro Tip:
If you shoot handheld or use natural light, pick a lens with image stabilization (IS/VR/OSS) and a minimum aperture of f/4 for best results.
5. Buying Based on Brand, Not Compatibility
A surprisingly common mistake is assuming all lenses work across systems. A Canon EF lens won’t fit directly on a Sony E-mount or Nikon Z camera without an adapter — and even then, autofocus may not function properly.
Adapters can slow focus, add bulk, and even introduce optical issues.
⚙️ Always Check:
- Mount type (Canon RF, Nikon Z, Sony E, etc.)
- Sensor size (Full-frame vs APS-C)
- Autofocus and stabilization support
If you plan to upgrade cameras soon, look for native mirrorless lenses — they’re lighter, faster, and better optimized for modern sensors.
6. Neglecting Post-Processing Efficiency
Real estate photographers often edit hundreds of photos per week. Using a lens that causes heavy distortion or chromatic aberration adds unnecessary editing time.
⏱️ What to Look For:
- Lenses with built-in lens profiles in Lightroom or Capture One.
- Low distortion lenses that need minimal correction.
- Consistent color rendering across focal lengths to simplify color grading.
📊 Case Example:
Photographers using tilt-shift or high-end wide lenses reported saving up to 30% editing time, according to Fstoppers 2024 Workflow Survey.
7. Underestimating Weight and Ergonomics
Real estate shoots involve constant movement — going from room to room, climbing stairs, and repositioning lights or tripods. Using a bulky or unbalanced lens can quickly lead to fatigue and slower shoots.
⚖️ Recommended Weight Range:
Try to keep lenses under 800 grams (1.7 lbs) if you shoot handheld or with gimbals.
Lightweight options like the Nikon Z 14–30mm f/4 S (485g) or Canon RF 14–35mm f/4L IS (540g) are perfect for all-day work without sacrificing quality.
8. Not Testing Before Buying
No matter how good a lens looks on paper, test it in real-world conditions before committing. Borrow, rent, or buy from a retailer with a solid return policy.
When testing, shoot a variety of scenes:
- Small rooms and wide exteriors
- Shots toward bright windows
- Low-light interior corners
- Straight architectural lines
This ensures the lens performs consistently for your specific workflow.
💬 Quote:
“Lens reviews are great, but nothing beats shooting your own test photos. Every property and lighting condition tells you something different.”
— Marta Reyes, Realtor & Photographer
Key Takeaway
Avoiding these pitfalls will save you money, time, and client frustration. The perfect good lens for real estate photography should balance:
- Focal range versatility
- Low distortion and high edge sharpness
- Lightweight build and reliable autofocus
Remember: even the best lens can’t fix poor composition or lighting — but the right one will help you create the clean, bright, and balanced images that sell homes faster.
Real Estate Lens Accessories and Gear Recommendations
A good lens for real estate photography is only as powerful as the tools you pair with it. The right accessories — from tripods to filters — help you maximize image sharpness, maintain accuracy, and improve your workflow on every shoot.
Whether you’re capturing interiors with complex lighting or exteriors at dusk, having reliable gear ensures that your photos are crisp, well-lit, and distortion-free. Below are the must-have accessories for real estate photographers, organized by purpose.
1. Tripod – The Foundation of Sharp Real Estate Photos
A sturdy tripod is non-negotiable for real estate photography. It allows for slower shutter speeds without introducing camera shake, ensuring sharp results even in dimly lit interiors.
🦵 Recommended Features:
- Adjustable height (up to 70 inches for flexibility)
- Ball head or geared head for smooth adjustments
- Lightweight yet stable (carbon fiber preferred)
✅ Top Tripod Picks:
| Tripod | Weight | Material | Key Benefit |
| Manfrotto 190XPRO Carbon Fiber | 3.5 lbs | Carbon Fiber | Compact and stable for interiors |
| Benro Mach3 TMA37C | 4.1 lbs | Carbon Fiber | Ideal for heavy camera/lens setups |
| Vanguard Alta Pro 263AB | 5.4 lbs | Aluminum | Great value and flexible angles |
💬 Pro Tip:
If you shoot multiple floors or small rooms, consider a compact travel tripod like the Peak Design Carbon Fiber — it fits easily in tight spaces and still offers professional stability.
2. Lens Filters – Control Light and Reflections
Real estate photography often involves shooting through windows, glass doors, or reflective surfaces. Filters help you control glare, reflections, and harsh lighting conditions.
🧿 Key Filter Types:
- Circular Polarizing Filter (CPL): Reduces window glare and enhances sky and foliage contrast.
- Neutral Density (ND) Filter: Balances exposure in bright outdoor scenes.
- UV Filter: Protects your lens from scratches and dust.
✅ Recommended Filters:
| Filter Type | Best For | Example Product |
| CPL | Interiors with reflections | B+W 77mm Kaesemann MRC CPL |
| ND | Bright exteriors | Tiffen Variable ND Filter |
| UV | Everyday protection | Hoya UV Digital HMC Filter |
📊 Fact:
A polarizing filter can reduce glare by up to 90%, especially useful when photographing interiors with shiny floors or metal surfaces.
3. Lens Hood – Avoid Unwanted Flare
A lens hood shields your lens from stray light that can cause lens flare and reduced contrast. This is particularly useful when shooting properties with bright windows or outdoor sunlight.
💡 Pro Tip:
Always use the manufacturer’s dedicated lens hood — third-party versions may not fit perfectly and can cause vignetting (dark edges).
4. Remote Shutter Release – Eliminate Camera Shake
Even with a tripod, pressing the shutter button can introduce tiny vibrations that soften your images. A remote shutter release (wired or wireless) eliminates this issue and helps you capture tack-sharp, HDR-ready images.
✅ Best Options:
| Device | Type | Compatibility |
| Canon BR-E1 | Wireless | Canon RF/EF systems |
| Nikon ML-L3 | Infrared | Nikon DSLRs |
| Sony RMT-P1BT | Bluetooth | Sony E-mount cameras |
💬 Pro Tip:
You can also use your camera’s mobile app (like Canon Camera Connect or Sony Imaging Edge) to trigger shots remotely — perfect for HDR brackets or virtual tours.
5. Lens Cleaning Kit – Maintain Optical Quality
A dirty or smudged lens can ruin your sharpness, contrast, and overall image quality. Real estate environments often have dust, fingerprints, and light reflections, so keeping your lens clean is critical.
🧽 Essential Cleaning Tools:
- Lens blower: Remove dust without touching the glass.
- Microfiber cloth: Wipe away smudges safely.
- Lens cleaning solution: For stubborn marks.
✅ Recommended Kit:
Zeiss Lens Cleaning Kit — Includes spray, brush, blower, and microfiber cloth; ideal for fieldwork.
📊 Data Point:
A study by Imaging Resource found that even a small fingerprint on a front lens element can reduce image contrast by up to 15% in backlit conditions.
6. Flash and Lighting Accessories – Brighten Dim Spaces
Even the best good lens for real estate photography struggles without proper lighting. Real estate interiors often have uneven light and color temperatures, so adding controlled flash helps balance exposures and create professional-grade results.
💡 Lighting Essentials:
- Speedlight or on-camera flash for bounce lighting
- Wireless triggers to fire multiple lights
- Softboxes or umbrellas for diffused light
- Continuous LED panels for video or natural lighting blends
✅ Recommended Kits:
| Product | Type | Use Case |
| Godox V1 Flash | Speedlight | Bounce flash for interiors |
| Neewer 660 LED Kit | Continuous light | Video and ambient fill |
| Yongnuo RF603C | Wireless Trigger | Sync multiple flashes |
💬 Pro Tip:
Always use diffused lighting. Harsh flash can create hot spots and reflections, while soft, even light preserves texture and depth.
7. Bubble Level or Hot Shoe Level
Keeping your camera perfectly straight is essential in real estate photography — even a 1° tilt can make walls look crooked. A bubble level (or electronic level built into modern cameras) ensures that horizontal and vertical lines stay straight.
✅ Quick Picks:
- Manfrotto Hot Shoe Bubble Level
- SmallRig Spirit Level for Cameras
These tiny accessories can make a huge difference in perspective consistency across your property shots.
8. Lens Case and Protection Gear
Real estate photographers move between locations constantly. A padded lens case or weather-sealed camera bag ensures your expensive gear remains safe from bumps, moisture, and dust.
🎒 Recommended Options:
| Brand | Product | Highlight |
| Lowepro | ProTactic 450 AW II | Modular, weather-resistant |
| Peak Design | Everyday Backpack 20L | Sleek, lightweight, customizable |
| Think Tank | Airport Essentials | Ideal for travel and storage |
💬 Tip:
Always carry a rain cover or weather sleeve — many property shoots happen outdoors or in partially finished construction sites.
Summary Table – Must-Have Lens Accessories
| Accessory | Primary Purpose | Why It Matters |
| Tripod | Stability | Enables long exposures and sharp images |
| CPL Filter | Glare control | Reduces reflections from glass and floors |
| Lens Hood | Flare prevention | Improves contrast and image quality |
| Remote Shutter | Stability | Prevents shake for tack-sharp images |
| Cleaning Kit | Maintenance | Preserves lens quality and clarity |
| Lighting Gear | Illumination | Balances exposure across rooms |
| Bubble Level | Composition | Keeps lines straight and true |
| Lens Case | Protection | Extends gear lifespan |
Final Thoughts
Accessories might not get as much attention as lenses, but they’re the unsung heroes of professional real estate photography. Each tool — from a simple CPL filter to a precision tripod — plays a vital role in achieving crisp, market-ready images.
A good lens for real estate photography performs best when supported by:
- A stable setup,
- Clean optics, and
- Proper lighting control.
Investing in these essentials doesn’t just enhance image quality — it boosts your efficiency, consistency, and credibility as a real estate photographer.
Tips for Getting the Most Out of Your Real Estate Lens
Owning a good lens for real estate photography is only half the story — knowing how to use it effectively is what separates amateurs from professionals. Proper lens technique, camera setup, and composition strategy can transform an average property photo into a stunning, high-converting image.
Let’s go over proven, field-tested methods to maximize lens performance, improve sharpness, and capture spaces that truly sell.
1. Use the Right Aperture for Sharpness and Depth
Aperture settings control how much light enters your camera and how much of the scene is in focus.
For real estate photography, your goal is maximum depth of field — keeping everything from foreground furniture to background walls in focus.
📸 Ideal Aperture Range:
- f/8 to f/11 for wide-angle lenses
- f/11 to f/16 for telephoto shots (exteriors or details)
💬 Pro Tip:
Avoid shooting wide open (like f/2.8 or f/4) — while great for portraits, it causes soft edges and shallow focus, which can distort interiors.
📊 Quick Comparison Table:
| Aperture | Result | Best Use |
| f/2.8 | Shallow depth, soft corners | Artistic shots or object details |
| f/8 | Balanced sharpness and light | Standard interior shots |
| f/11 | Deep focus and detail | Large rooms, exteriors |
| f/16+ | May soften image | Use sparingly (diffraction) |
2. Level Your Camera for Perfect Vertical Lines
Nothing screams “amateur” like tilted walls or crooked door frames. Real estate photos should always maintain straight vertical and horizontal lines, which helps properties look natural and professional.
🧭 Tips to Stay Aligned:
- Use your camera’s built-in electronic level (most DSLRs and mirrorless cameras have it).
- Adjust the tripod height so the lens sits midway between the floor and ceiling.
- Avoid tilting the camera upward or downward — instead, crop later if needed.
💬 Expert Quote:
“Straight lines sell homes. Crooked lines confuse the eye and make rooms feel distorted.”
— Scott Hargis, Architectural Photographer
3. Shoot in RAW for Maximum Editing Flexibility
JPEGs are convenient, but RAW files retain 3–5× more data, giving you greater flexibility to correct exposure, color balance, and shadows during post-processing.
When using a good lens for real estate photography, RAW captures help maintain dynamic range — crucial for balancing bright windows and darker interiors.
✅ Benefits of Shooting in RAW:
- Recover overexposed highlights
- Adjust white balance without quality loss
- Reduce noise in post-processing
- Preserve details for HDR blending
💬 Pro Tip:
Always back up your RAW files — they’re your digital negatives and hold immense value for re-editing or re-exporting in different formats.
4. Use HDR Bracketing for Balanced Lighting
Real estate interiors often feature extreme light contrasts — dark corners and bright windows in the same frame. HDR (High Dynamic Range) bracketing solves this problem.
🏠 HDR Setup:
- Set your camera on a tripod.
- Take 3–5 shots of the same scene at different exposures:
- Underexposed (to preserve highlights)
- Normal exposure
- Overexposed (to recover shadows)
- Underexposed (to preserve highlights)
- Merge them in editing software (like Lightroom or Aurora HDR).
📊 Fact:
According to Photodex, properly merged HDR photos can increase perceived image quality by 40% and reduce editing time by half.
5. Focus Manually for Precision
Auto-focus can sometimes struggle with wide-angle distortion or reflective surfaces. For interiors, manual focus ensures perfect sharpness from front to back.
🧠 Manual Focus Tips:
- Use Live View and zoom in 10× to fine-tune focus.
- Focus one-third into the scene to balance depth (hyperfocal distance rule).
- Check focus again after recomposing the shot.
💬 Pro Tip:
If your camera supports focus peaking, enable it — this feature highlights in-focus areas with color outlines for precision.
6. Keep ISO as Low as Possible
Low ISO means cleaner, noise-free images. Since you’ll be using a tripod, you can afford slower shutter speeds.
📷 Recommended ISO Settings:
| Scenario | ISO Range | Notes |
| Bright interiors | ISO 100–200 | Ideal for best quality |
| Dim rooms | ISO 400–800 | Acceptable with noise reduction |
| Exteriors | ISO 100 | Maximize detail and sharpness |
💬 Pro Tip:
Use your camera’s base ISO whenever possible — usually 100 or 200 — for the highest dynamic range and lowest noise.
7. Optimize Composition for Depth and Flow
A good real estate image doesn’t just document a space — it invites the viewer to explore. Use composition techniques to make rooms appear open, balanced, and inviting.
🏡 Composition Techniques:
- Shoot from chest height (4–5 feet): Feels natural to viewers.
- Show at least 2 walls per shot for depth perception.
- Use leading lines (floors, beams, or furniture) to guide the eye.
- Avoid tight crops that cut off important elements (windows, furniture edges).
💬 Pro Tip:
Compose with buyer intent in mind — show how spaces connect rather than focusing on isolated details.
8. Calibrate Your Lens for Accuracy
Even a good lens for real estate photography may have slight focusing or distortion issues. Calibration ensures your images are sharp, straight, and color-accurate.
🧰 Calibration Steps:
- Use in-camera lens correction profiles for distortion and vignetting.
- Periodically perform AF micro-adjustment if your camera supports it.
- Calibrate color accuracy using a gray card or ColorChecker Passport.
📊 Fact:
Proper calibration can improve corner sharpness by 10–15% and color consistency across a shoot.
9. Learn to Balance Natural and Artificial Light
Mixing window light with interior bulbs can create color temperature inconsistencies — orange walls and blue windows. Correct balance keeps colors neutral and true to life.
💡 Lighting Balance Tips:
- Set custom white balance (around 3500–4500K indoors).
- Turn off mixed light sources when possible (e.g., lamps and daylight together).
- In editing, use selective color correction to fix temperature mismatches.
💬 Pro Tip:
Aim for natural-looking tones. Real estate buyers expect clean, daylight-balanced interiors — not overly warm or cool images.
10. Regularly Clean and Maintain Your Lens
Dust, smudges, and water spots degrade image quality — even with the best lens. Keep your optics spotless before every shoot.
🧽 Cleaning Routine:
- Use a blower to remove loose dust.
- Gently wipe glass with a microfiber cloth and cleaning solution.
- Store your lens with front and rear caps on when not in use.
💬 Pro Tip:
Inspect your lens under a bright LED light before each shoot — it helps you spot tiny smudges invisible to the naked eye.
Final Thoughts
A good lens for real estate photography is a precision tool — but mastery comes from skill, not specs alone. By combining technical understanding with thoughtful composition and meticulous attention to detail, you can produce professional, magazine-quality images that make every property stand out.
Remember:
- Use correct aperture and ISO settings.
- Maintain perfect alignment and sharpness.
- Shoot HDR and RAW for ultimate control.
- And most importantly, practice consistently — experience is your best teacher.
Editing and Post-Processing for Real Estate Lens Images
A good lens for real estate photography provides the clarity, sharpness, and wide perspective needed to capture property interiors beautifully — but editing is what transforms your photos into professional-quality listings.
Even with perfect lighting and camera technique, unedited RAW images often look flat or uneven. Post-processing helps balance exposure, correct color, and highlight architectural beauty in a natural, appealing way.
1. Why Editing Matters in Real Estate Photography
Editing is not about creating unrealistic images — it’s about presenting the property at its best while maintaining accuracy.
Buyers expect clean, bright, inviting visuals that represent what they’ll experience in person. Proper editing helps:
- Fix exposure differences between bright windows and dark corners.
- Correct lens distortion and perspective issues.
- Adjust white balance for consistent, neutral tones.
- Enhance details and textures for a crisp, polished look.
📊 Fact:
According to a Redfin study, homes with professionally edited photos sell 32% faster and often for $3,000–$11,000 more than listings with unedited images.
2. Essential Software for Real Estate Photo Editing
Modern editing tools make post-processing efficient and non-destructive — you can always revert changes if needed.
🧰 Recommended Editing Software:
| Software | Primary Use | Highlights |
| Adobe Lightroom Classic | Global adjustments, batch editing | Best all-round tool for real estate workflows |
| Adobe Photoshop | Local edits, object removal | Precision retouching for reflections and distractions |
| Aurora HDR | HDR blending | Creates natural HDR images from exposure brackets |
| Capture One Pro | Advanced color grading | Excellent tethered shooting and color control |
| Luminar Neo | AI-based enhancement | Quick lighting and sky replacements |
💬 Pro Tip:
Lightroom and Photoshop together form the gold standard workflow — Lightroom for bulk adjustments and Photoshop for fine-tuning.
3. Recommended Editing Workflow (Step-by-Step)
A consistent editing workflow saves time and ensures every photo looks professional and cohesive.
🔧 Step-by-Step Editing Process:
- Import RAW Files
- Import into Lightroom or Capture One.
- Organize by room or property for easy navigation.
- Import into Lightroom or Capture One.
- Apply Lens Corrections
- Enable Profile Corrections to fix distortion, vignetting, and chromatic aberration.
- Especially important for wide-angle lenses (like 16–35mm).
- Enable Profile Corrections to fix distortion, vignetting, and chromatic aberration.
- White Balance and Color Correction
- Use the eyedropper tool on neutral surfaces (like white walls).
- Adjust Temp and Tint to neutralize color casts.
- Use the eyedropper tool on neutral surfaces (like white walls).
- Exposure and Tone Adjustments
- Increase Exposure for brightness.
- Lower Highlights to recover window details.
- Raise Shadows to brighten dark areas.
- Fine-tune Contrast, Whites, and Blacks for balanced tonality.
- Increase Exposure for brightness.
- Clarity, Texture, and Dehaze
- Add a touch of Clarity (+10–20) for crisp detail.
- Avoid overuse — too much can make images look artificial.
- Add a touch of Clarity (+10–20) for crisp detail.
- Straighten and Crop
- Use Transform > Guided Upright to align verticals and horizontals.
- Maintain consistent aspect ratios (usually 3:2 or 16:9).
- Use Transform > Guided Upright to align verticals and horizontals.
- Remove Distractions
- In Photoshop, use Content-Aware Fill to remove cords, reflections, or wall blemishes.
- In Photoshop, use Content-Aware Fill to remove cords, reflections, or wall blemishes.
- Sharpen and Export
- Apply moderate sharpening for web display.
- Export in JPEG at 3000px wide, 80–90% quality, sRGB color space.
- Apply moderate sharpening for web display.
📊 Tip:
Create and save editing presets for different lighting conditions — “Daylight Interiors,” “Twilight Exteriors,” etc. It saves hours per project.
4. HDR and Exposure Blending Techniques
As covered earlier, HDR helps manage extreme lighting differences. Editing HDR brackets correctly ensures natural-looking results, not overly saturated, unrealistic images.
🌅 Best Practices for HDR Blending:
- Merge 3–5 exposures using Lightroom HDR Merge or Aurora HDR.
- Avoid excessive tone mapping — keep colors neutral and true-to-life.
- Adjust Deghosting to prevent movement artifacts (like trees or curtains).
- Add local contrast selectively for depth and realism.
💬 Pro Tip:
When editing HDR photos, compare them with the base exposure — if your HDR looks dramatically different, dial back the intensity.
5. Fixing Lens Distortion and Perspective
Even the best lens for real estate photography can create barrel distortion or perspective skew, especially with wide-angle lenses. Correcting these ensures walls stay straight and rooms look natural.
🧭 Correction Tips:
- In Lightroom, go to Lens Corrections > Enable Profile Corrections.
- Use the Transform Panel and “Auto” or “Guided Upright” options.
- For complex interiors, adjust vertical and horizontal sliders manually.
📊 Fact:
Correcting distortion can improve buyer perception — a Zillow study found that photos with accurate geometry increased viewer trust by 22%.
6. Balancing Light and Color Temperature
Light in real estate photos can vary drastically — tungsten bulbs, daylight, and fluorescent sources often mix. Use editing tools to achieve consistency.
💡 Workflow for Balanced Lighting:
- Use the White Balance Selector tool in Lightroom.
- Match all rooms to a consistent Kelvin range (4000–5000K).
- Apply HSL adjustments to fix color dominance (reduce orange or blue).
- Add Graduated Filters to tone down over-bright windows or skylights.
💬 Pro Tip:
Neutral color balance helps buyers visualize the space accurately — avoid overly warm or cool tones unless it matches the property’s natural ambiance.
7. Enhancing Detail and Texture
Texture and clarity make interiors feel realistic and tactile — but overdoing it can make surfaces look gritty.
✅ Ideal Adjustments:
- Texture: +10 to +20 for wood and stone surfaces.
- Clarity: +10 for overall punch.
- Sharpening: 50–70 in Lightroom (with Masking 30–50 to protect smooth areas).
💬 Pro Tip:
Use the Masking Slider (hold Alt/Option) to apply sharpening only to edges, not flat surfaces like walls or ceilings.
8. Replacing Skies and Enhancing Exteriors
Exterior real estate photos often suffer from dull skies. Sky replacement adds vibrancy without faking realism.
🌤 Tools for Sky Enhancement:
- Luminar Neo Sky AI — automatic sky replacement with reflection matching.
- Photoshop Sky Replacement Tool — detailed manual control.
📊 Fact:
Listings with vibrant, natural skies see 21% higher engagement on property websites (source: Realtor.com).
💬 Ethical Tip:
Only replace skies for mood enhancement — never misrepresent the property or its lighting conditions.
9. Batch Editing for Consistency
For real estate photographers handling dozens of photos per listing, batch editing is essential. Consistency builds brand trust and helps clients recognize your style.
⚙️ Batch Editing Tips:
- Apply global adjustments using Lightroom Presets.
- Sync edits across similar shots (same room, lighting, or time of day).
- Double-check each image before exporting — small variations matter.
💬 Pro Tip:
Use virtual copies in Lightroom for multiple style variations (e.g., bright daylight vs. moody dusk).
10. Exporting for Web and Print
Proper export settings ensure your photos look great whether viewed online or printed in brochures.
📁 Recommended Export Settings:
| Purpose | Format | Size | Quality | Color Space |
| MLS / Websites | JPEG | 3000px long edge | 80–90% | sRGB |
| TIFF / JPEG | 300 DPI | 100% | Adobe RGB | |
| Virtual Tours | JPEG | 4096px width | 85% | sRGB |
💬 Pro Tip:
Rename files with descriptive keywords for SEO (e.g., modern-kitchen-real-estate-photo.jpg).
Final Thoughts
Editing and post-processing turn your camera’s raw capture into a refined, market-ready image.
When paired with a good lens for real estate photography, effective editing helps:
- Balance light and shadow seamlessly.
- Correct geometric distortion.
- Enhance texture, color, and clarity.
- Deliver consistent, professional results every time.
“Editing is the art of revealing the property’s full potential — not inventing it.”
— Mike Kelley, Architectural Photographer
Invest time mastering these post-processing skills, and you’ll elevate not just your photos, but your reputation as a trusted real estate photographer.
Common Mistakes to Avoid When Choosing or Using a Real Estate Lens
A good lens for real estate photography can completely transform how a property looks — but even the best lens won’t help if it’s used incorrectly. From poor lens selection to technical missteps, small errors can lead to big issues like distortion, blur, or unnatural lighting.
Below are the most frequent mistakes real estate photographers make — and how to avoid them for professional, polished results.
1. Choosing the Wrong Focal Length
One of the most common beginner mistakes is using a lens that’s too wide or too narrow.
A super wide lens (like 10mm) can make rooms look unnaturally stretched, while a narrow focal length (like 35mm) can feel too cramped for tight spaces.
⚠️ Why It Matters:
- Too wide = Barrel distortion, bent walls, exaggerated spaces.
- Too narrow = Cropping out important room elements.
✅ Solution:
Stick within the sweet spot for real estate:
- Full-frame cameras: 16mm–24mm
- APS-C sensors: 10mm–18mm
💬 Pro Tip:
For exteriors, step back and use 24mm–35mm for a more natural field of view.
2. Ignoring Lens Distortion Correction
Even the best wide-angle lenses introduce barrel distortion — straight lines appear curved, especially near the frame edges.
⚠️ Common Mistake:
Uploading uncorrected photos to listings, which makes walls and doors look bent or warped.
✅ Solution:
- Always enable Lens Profile Correction in your editing software.
- Use Lightroom or Photoshop’s Transform > Upright tool for vertical alignment.
📊 Fact:
Listings with straight, distortion-free lines are 28% more likely to be perceived as professionally shot (source: Real Estate Photographer Pro Study).
3. Overusing Ultra-Wide Lenses Indoors
Wide-angle lenses are powerful tools — but overuse leads to unnatural perspectives.
For instance, shooting a small bathroom with a 10mm lens may make it look three times larger than reality, disappointing buyers when they visit.
✅ Best Practice:
Use 16mm–20mm for small to medium interiors.
Only go wider when absolutely necessary (tight hallways or tiny rooms).
💬 Pro Tip:
Buyers value realism. Real estate photos should invite, not mislead.
4. Using Aperture Settings That Are Too Wide
Real estate photographers often make the mistake of shooting wide open (f/2.8 or f/4) because they think it will add light or sharpness.
In reality, this reduces depth of field, making furniture or walls appear blurry.
✅ Best Aperture Range:
- f/8 to f/11 — the sharpest zone for most lenses.
📊 Fact:
Most lenses reach peak sharpness 2–3 stops down from maximum aperture (e.g., f/2.8 lens is sharpest at f/8).
5. Failing to Keep the Camera Level
Crooked lines are one of the most noticeable signs of an amateur real estate photo.
Even a 1° tilt can make walls look like they’re leaning.
⚠️ Mistake:
Tilting the camera up or down to “fit more in the frame.”
✅ Solution:
- Mount your camera on a tripod with a bubble level.
- Adjust height so the camera is centered vertically in the room (around 4–5 feet high).
- Use software correction only as a last resort.
💬 Pro Tip:
Consistent, straight verticals make your images feel balanced and professional.
6. Forgetting About Lighting Balance
Real estate photography often involves mixed lighting — daylight from windows, tungsten bulbs, and overhead LEDs.
If not corrected, this mix creates unpleasant color casts (orange, blue, or green).
⚠️ Mistake:
Relying on Auto White Balance, which can shift between shots.
✅ Solution:
- Set Custom White Balance (around 4000–5000K).
- Shoot in RAW for easy correction later.
- Use consistent lighting setups when possible.
📊 Fact:
Color-inconsistent photos reduce buyer trust and perceived property quality by over 20% (source: NAR Visual Marketing Study).
7. Shooting Handheld Without Stabilization
Handheld shooting introduces motion blur — especially in dim interiors where slower shutter speeds are necessary.
Even small vibrations can cause loss of detail.
✅ Solution:
- Always use a tripod for interiors.
- For handheld exteriors, enable lens image stabilization (IS/VR/OSS).
- Use a remote shutter release to avoid touching the camera.
💬 Pro Tip:
Tripods not only eliminate blur — they allow you to fine-tune framing and HDR brackets easily.
8. Neglecting Lens Maintenance
Dust, smudges, and fingerprints can reduce clarity, introduce lens flare, and make expensive glass perform like a cheap kit lens.
⚠️ Mistake:
Wiping the lens with clothing or ignoring it altogether.
✅ Solution:
- Use a blower and microfiber cloth before every shoot.
- Store lenses in a dry, padded case with silica gel packs.
- Clean filters and rear lens elements periodically.
📊 Fact:
Dirty front elements can lower image contrast by 10–15%, especially in backlit conditions (Imaging Resource Study).
9. Ignoring Post-Processing Corrections
A good real estate lens helps you capture the shot, but editing perfects it. Skipping post-processing means you lose the chance to fix distortion, enhance brightness, and unify tones.
✅ Key Edits to Always Apply:
- Lens profile correction
- Straighten verticals
- White balance adjustment
- Sharpening and contrast control
💬 Pro Tip:
Batch-editing in Lightroom ensures consistency across a full property gallery.
10. Focusing Too Much on Gear, Not Technique
Many photographers fall into the trap of buying new lenses instead of improving skills. While equipment helps, composition, lighting, and editing matter far more.
⚠️ Mistake:
Constantly upgrading lenses without mastering fundamentals like exposure or composition.
✅ Solution:
- Learn how your current lens performs at different apertures.
- Practice framing, balance, and lighting control.
- Study top-performing real estate listings for inspiration.
💬 Quote:
“A $500 lens in the hands of a skilled photographer beats a $2,000 lens used poorly.”
— Peter Hurley, Commercial Photographer
11. Not Using the Right Accessories
A great lens still needs the right support gear — without it, even the best optics underperform.
⚠️ Mistake:
Skipping essential accessories like tripods, polarizers, and remote shutters.
✅ Solution:
Use:
- Tripod for stability
- Polarizing filter to reduce glare
- Lens hood to minimize flare
- Remote shutter to avoid vibration
💬 Pro Tip:
Think of accessories as “performance enhancers” for your lens — not optional extras.
12. Misrepresenting Space Through Editing
Over-editing (e.g., stretching or over-brightening) can make properties look fake or deceptive.
⚠️ Mistake:
Using distortion correction tools excessively or brightening beyond realism.
✅ Solution:
- Keep proportions true to life.
- Maintain natural brightness levels.
- Use editing to enhance, not deceive.
📊 Fact:
Misleading property photos result in higher bounce rates on listings and lower buyer satisfaction scores (source: Zillow Consumer Insights 2024).
Final Thoughts
Avoiding these mistakes can instantly elevate your work — regardless of your gear.
A good lens for real estate photography delivers incredible clarity, but it’s your technique, discipline, and understanding that turn a simple shot into a professional showcase image.
Remember:
- Choose the right focal length for your space.
- Keep your camera level and lighting consistent.
- Maintain your gear religiously.
- And most importantly, edit with realism and honesty.
“Real estate photography is not about selling a lens — it’s about selling a lifestyle.”
— Mike Kelley, Architectural Photographer
Best Lenses for Real Estate Photography in 2026 (Recommendations + Comparison Chart)
Choosing a good lens for real estate photography can be overwhelming. With dozens of options, varying price points, and brand ecosystems, it’s important to find a lens that fits your camera system, budget, and shooting style.
To help, we’ve analyzed expert reviews, user feedback, and field tests from professional real estate photographers. Below is a curated list of the top-performing wide-angle lenses across popular brands — all tested for sharpness, minimal distortion, autofocus accuracy, and value.
📊 Quick Comparison Chart: Best Real Estate Lenses (2026)
| Lens | Mount / Sensor Type | Focal Length | Aperture | Key Features | Approx. Price (USD) |
| Canon RF 15–35mm f/2.8L IS USM | Canon Full Frame (Mirrorless) | 15–35mm | f/2.8 | Image Stabilization, Edge Sharpness | $2,099 |
| Nikon Z 14–30mm f/4 S | Nikon Full Frame (Mirrorless) | 14–30mm | f/4 | Compact, Low Distortion | $1,299 |
| Sony FE 16–35mm f/4 G PZ | Sony Full Frame (Mirrorless) | 16–35mm | f/4 | Power Zoom, Lightweight | $1,199 |
| Sigma 10–20mm f/3.5 EX DC HSM | Canon/Nikon APS-C | 10–20mm | f/3.5 | Affordable, Wide Coverage | $449 |
| Tamron 11–20mm f/2.8 Di III-A RXD | Sony/Fuji APS-C | 11–20mm | f/2.8 | Fast Aperture, Compact | $699 |
| Fujifilm XF 8–16mm f/2.8 R LM WR | Fuji APS-C | 8–16mm | f/2.8 | Premium Build, Weather Sealed | $1,599 |
| Laowa 15mm f/4 Macro Shift | Multi-Mount | 15mm | f/4 | Shift Lens for Perspective Control | $499 |
Best Canon Lens for Real Estate Photography (Full Frame)
🔸 Canon RF 15–35mm f/2.8L IS USM
A flagship lens that delivers incredible edge-to-edge sharpness, this Canon RF lens is the go-to for many real estate pros.
Key Strengths:
- Constant f/2.8 aperture ideal for low light interiors.
- Built-in Image Stabilization (IS) — rare in ultra-wides.
- Exceptional build quality and weather sealing.
Why It’s Great for Real Estate:
This lens handles everything from tight bathrooms to wide living spaces, while maintaining perfect geometry. The IS feature also helps when shooting handheld exterior twilight shots.
📸 Pro Tip: Combine this lens with the Canon EOS R5 or R6 Mark II for superb HDR performance.
Best Nikon Lens for Real Estate Photography (Full Frame)
🔸 Nikon Z 14–30mm f/4 S
Compact, lightweight, and razor sharp, this is the perfect Nikon Z-series wide-angle lens for both professionals and enthusiasts.
Key Strengths:
- Minimal barrel distortion even at 14mm.
- Excellent flare control and color consistency.
- Accepts 82mm filters — rare for such a wide lens.
Why It’s Great for Real Estate:
The flat front element makes filter usage simple, and it produces straight, natural-looking lines ideal for architectural shots.
💬 Expert Insight:
“The Nikon Z 14–30mm f/4 S outperforms many faster lenses in real-world clarity and distortion control.”
— Digital Photography Review (2026)
Best Sony Lens for Real Estate Photography (Full Frame)
🔸 Sony FE 16–35mm f/4 G PZ
Sony’s latest Power Zoom (PZ) version of the 16–35mm is optimized for video and hybrid shooters, making it a top choice for real estate agents who shoot both photos and walkthrough videos.
Key Strengths:
- Ultra-smooth motorized zoom for video pans.
- Lightweight design (only 353g).
- Excellent edge-to-edge sharpness.
Why It’s Great for Real Estate:
This lens gives flexibility for handheld and gimbal shots, and its consistent optical performance makes interiors look natural and distortion-free.
📊 Stat:
Listings featuring both photos and video tours see +52% more engagement (Realtor.com 2024 Study).
Best APS-C Lens for Real Estate Photography (Canon/Nikon DSLRs)
🔸 Sigma 10–20mm f/3.5 EX DC HSM
A legendary wide-angle lens known for affordability and durability. Ideal for photographers using crop-sensor DSLRs.
Key Strengths:
- Great sharpness at f/5.6–f/8.
- Affordable and widely available.
- Fast, quiet autofocus motor.
Why It’s Great for Real Estate:
It provides a 16–32mm full-frame equivalent, covering small interiors and expansive exteriors with ease.
💬 Budget Pick:
If you’re just starting out in real estate photography, this is the best entry-level wide-angle lens available in 2026.
Best Sony/Fujifilm APS-C Lens
🔸 Tamron 11–20mm f/2.8 Di III-A RXD
This Tamron lens continues to dominate the APS-C mirrorless segment thanks to its compact build and f/2.8 aperture.
Key Strengths:
- Excellent corner-to-corner sharpness.
- Fast and quiet autofocus.
- Lightweight (335g).
Why It’s Great for Real Estate:
Ideal for low-light interiors, HDR bracketing, and handheld twilight shots. Works flawlessly with Sony a6700 and Fujifilm X-S20.
📸 Pro Tip:
Use this lens at 13–15mm for minimal distortion and a realistic sense of space.
Best Fujifilm Lens for Real Estate Photography (Premium Choice)
🔸 Fujifilm XF 8–16mm f/2.8 R LM WR
Fujifilm’s premium ultra-wide is built for professionals who demand precision and color fidelity.
Key Strengths:
- Outstanding optical clarity.
- Weather-sealed and rugged.
- Consistent sharpness across all focal lengths.
Why It’s Great for Real Estate:
At 8mm (12mm full-frame equivalent), this lens makes even small rooms appear open and inviting, without exaggeration.
💬 Quote:
“It’s the most optically perfect ultra-wide zoom Fujifilm has ever made.”
— DPReview Labs
Best Specialty Lens: Tilt-Shift for Architectural Accuracy
🔸 Laowa 15mm f/4 Wide-Angle Macro Shift
This manual lens features a 6mm shift capability, allowing precise vertical correction — essential for shooting tall interiors or exteriors without distortion.
Key Strengths:
- Affordable tilt-shift alternative.
- Compact and multi-mount compatible.
- Dual-purpose for macro and architectural work.
Why It’s Great for Real Estate:
Eliminates the need for post-processing corrections when shooting vertical compositions like two-story living rooms or staircases.
📊 Fact:
Shift lenses are used by architectural photographers worldwide to maintain true perspective straight out of the camera.
Final Recommendations Table
| Best For | Lens | Key Advantage |
| Professionals (Canon) | Canon RF 15–35mm f/2.8L IS USM | Pro-grade sharpness + stabilization |
| Professionals (Nikon) | Nikon Z 14–30mm f/4 S | Lightweight + minimal distortion |
| Hybrid Shooters (Sony) | Sony FE 16–35mm f/4 G PZ | Excellent for video + photo |
| Budget APS-C Users | Sigma 10–20mm f/3.5 | Affordable + sharp |
| Compact Mirrorless | Tamron 11–20mm f/2.8 | Lightweight + fast |
| Premium Fujifilm Setup | Fujifilm XF 8–16mm f/2.8 | Exceptional color + clarity |
| Architectural Accuracy | Laowa 15mm f/4 Shift | Perfect vertical lines |
Final Thoughts
The best lens for real estate photography depends on your camera system, budget, and level of experience — but what matters most is understanding your composition, lighting, and technique.
- Beginners: Start with a reliable Sigma or Tamron wide-angle zoom.
- Intermediate shooters: Consider investing in Canon RF or Nikon Z glass.
- Professionals: Add a tilt-shift lens to your kit for architectural perfection.
“A good lens doesn’t just capture a property — it captures how it feels to live there.”
— Scott Hargis, Architectural Photographer
Tips for Getting the Most Out of Your Real Estate Lens (Settings, Shooting Techniques & Editing)
Owning a good lens for real estate photography is only half the equation. The other half lies in how you use it — from camera setup to editing workflow.
Let’s explore practical, step-by-step strategies that elevate your images from average to professional-grade.
1. Use the Correct Aperture Range for Maximum Sharpness
Every lens has a “sweet spot” — typically two to three stops narrower than its widest aperture — where sharpness and depth of field are optimal.
✅ Recommended Aperture Ranges:
| Lens Type | Best Aperture Range | Notes |
| Ultra-Wide Zoom (f/2.8–f/4) | f/7.1–f/11 | Balanced sharpness and depth |
| Prime Lens (f/1.8–f/2.8) | f/5.6–f/8 | Minimize edge softness |
| Tilt-Shift | f/8–f/11 | Maximum clarity and plane control |
💬 Pro Tip:
Avoid going beyond f/13, as diffraction can reduce fine detail — especially on high-resolution sensors.
2. Always Shoot on a Tripod
Sharpness, composition, and consistency depend heavily on stability.
Benefits of Using a Tripod:
- Zero camera shake, even at slow shutter speeds.
- Consistent framing for HDR and bracketed exposures.
- Straight horizons and vertical lines every time.
📸 Real-World Example:
Professional real estate photographers almost never shoot handheld — even for well-lit exteriors. Tripods ensure every shot lines up perfectly in post-production.
3. Bracket Your Exposures for HDR
Real estate interiors often include both bright windows and dark corners. A single exposure can’t capture both — that’s where bracketing comes in.
✅ Typical HDR Bracket Setup:
- 3–5 exposures: –2 EV, 0 EV, +2 EV (optional ±1 EV steps)
- Use Aperture Priority Mode to maintain consistent depth.
- Merge later in Lightroom or Aurora HDR for balanced lighting.
📊 Fact:
HDR-blended images increase visual clarity by up to 40% without overexposure (source: Photographic Society of America, 2024).
💬 Pro Tip:
Keep your tripod locked — even minor movements between brackets can ruin alignment.
4. Correct Lens Distortion and Chromatic Aberration
Even top-tier wide-angle lenses can produce minor distortion or color fringing at the edges.
✅ Quick Fix in Lightroom:
- Go to Develop Module → Lens Corrections.
- Check “Enable Profile Corrections” and “Remove Chromatic Aberration.”
- Fine-tune with the Transform → Vertical tool if lines aren’t perfectly straight.
💬 Pro Tip:
Save these adjustments as a Lens Correction Preset to apply automatically to every batch import.
5. Keep Your Camera Level (Verticals Matter)
Crooked lines immediately make interiors look off.
✅ Tips for Level Shooting:
- Use a tripod with a bubble level or digital horizon display.
- Mount your camera 4–5 feet above the floor, roughly eye level.
- Avoid tilting the lens up or down — instead, back up and zoom out.
📸 Professional Trick:
Architectural photographers use tilt-shift lenses to maintain perspective while including tall ceilings or chandeliers.
6. Optimize Focal Length for Each Scene
Different focal lengths tell different visual stories. A good lens for real estate photography gives flexibility — but knowing how to use it is key.
✅ Ideal Focal Lengths:
| Scene Type | Best Focal Length Range | Result |
| Small Rooms / Bathrooms | 14–18mm | Spacious but natural |
| Living Rooms / Kitchens | 18–24mm | Balanced perspective |
| Exteriors / Facades | 24–35mm | True-to-life proportions |
💬 Pro Tip:
Avoid the extreme ends of your zoom range (like 10mm or 35mm) unless necessary — midrange settings often produce the least distortion.
7. Control Reflections and Glare
Windows, mirrors, and glossy countertops can ruin an otherwise perfect shot.
✅ How to Fix It:
- Use a circular polarizing filter to reduce glare and reflections.
- Shoot from a slight angle instead of directly facing reflective surfaces.
- Combine multiple exposures: one for reflections, one for interior light balance.
📊 Fact:
Using a polarizer can reduce surface glare by up to 70%, helping interiors appear cleaner and more inviting.
8. Balance Natural and Artificial Light
Mixed lighting can create strange color casts that ruin image harmony.
✅ Lighting Workflow:
- Turn off overly warm or orange bulbs when shooting during daylight.
- Use 5000K daylight-balanced bulbs for consistency.
- Adjust White Balance manually (4000–5000K).
💬 Pro Tip:
When using flash, bounce it off white walls or ceilings for soft, even illumination.
9. Use Live View for Precise Composition
Shooting through the viewfinder can limit your awareness of crooked lines or missed details.
✅ Live View Benefits:
- See exposure and composition in real-time.
- Use the grid overlay for alignment.
- Zoom in 100% to confirm focus before shooting.
📸 Real-World Example:
Top-tier photographers like Mike Kelley rely on live view tethered to laptops for absolute composition precision.
10. Post-Processing Workflow for Real Estate Images
Editing is where your lens’s full potential comes to life.
✅ Recommended Workflow:
- Import RAW files into Lightroom Classic.
- Apply Lens Corrections + White Balance presets.
- Merge HDR brackets (if applicable).
- Use Transform → Auto for perspective correction.
- Adjust contrast, shadows, and highlights.
- Export as 3000px JPEGs (high-quality, web-ready).
📊 Fact:
Properly edited images improve property engagement by up to 118% (source: Zillow Media Impact Report 2026).
11. Keep Your Lens Clean and Protected
A dusty or smudged lens can significantly degrade image sharpness and introduce unwanted flares.
✅ Best Practices:
- Use a blower before wiping.
- Clean with a microfiber cloth in circular motions.
- Use a UV filter for protection, especially during outdoor shoots.
💬 Pro Tip:
Store your lenses with silica gel packs to prevent moisture buildup and fungus growth.
12. Practice Composition and Storytelling
A technically sharp photo is good — but one that tells a story about the space is what sells homes.
✅ Composition Guidelines:
- Follow the Rule of Thirds for visual balance.
- Lead the viewer’s eye with lines and symmetry.
- Include windows and light sources naturally in frame.
- Capture multiple angles per room for variety.
💬 Quote:
“Real estate photography is not about showing walls — it’s about showing how life happens inside them.”
— Scott Hargis
Final Thoughts on Getting the Most from Your Lens
A good lens for real estate photography can transform your results — but your discipline, workflow, and attention to detail determine how professional those results look.
To summarize:
- Shoot with optimal aperture and focal length.
- Always use a tripod and correct distortion.
- Balance light, control reflections, and maintain consistent color.
- Refine your editing workflow for polished, professional delivery.
The more you understand how your lens “sees,” the better you can translate a property’s true atmosphere and space into compelling images that sell.
How to Choose the Best Lens for Your Real Estate Photography Style and Budget
A good lens for real estate photography isn’t just about specs — it’s about finding the right tool for your goals, budget, and workflow.
Choosing wisely means balancing image quality, flexibility, and cost — and understanding what type of photography you’ll be doing most often (residential interiors, commercial spaces, Airbnb listings, or luxury homes).
Let’s break down how to make the smartest decision possible.
1. Start with Your Camera System and Sensor Type
Your camera mount and sensor size will immediately narrow your options.
✅ Sensor Size Matters:
| Sensor Type | Example Cameras | Effective Focal Range | Lens Recommendations |
| Full Frame (FX) | Canon R5, Nikon Z7 II, Sony A7 IV | 16–35mm | Canon RF 15–35mm f/2.8L, Nikon Z 14–30mm f/4, Sony 16–35mm f/4 |
| APS-C (Crop Sensor) | Canon R7, Sony A6700, Fujifilm X-S20 | 10–20mm | Sigma 10–20mm f/3.5, Tamron 11–20mm f/2.8 |
| Micro Four Thirds (MFT) | Olympus OM-D, Panasonic GH6 | 7–14mm | Olympus 7–14mm f/2.8 PRO, Panasonic 8–18mm f/2.8–4 |
💬 Pro Tip:
If you plan to upgrade to full-frame later, invest in full-frame compatible lenses now — they hold value and transition easily.
2. Define Your Photography Style
Your lens should match your creative approach and target clients.
🏡 Residential Real Estate:
- Prioritize wide angles (16–24mm full-frame).
- You’ll often shoot tight interiors like bedrooms and bathrooms.
- Need consistent sharpness and easy distortion correction.
Ideal Lens:
Canon RF 15–35mm f/2.8L or Sony 16–35mm f/4 G PZ.
🏢 Commercial or Architectural Photography:
- Accuracy and geometry are crucial.
- Tilt-shift lenses offer precise control of verticals and perspective.
Ideal Lens:
Laowa 15mm f/4 Shift or Canon TS-E 17mm f/4L.
💬 Pro Insight:
“Architectural clients notice every detail — straight lines, true proportions, perfect lighting. Tilt-shift lenses pay for themselves in one job.”
— Mike Kelley, Architectural Photographer
🏘️ Vacation Rentals (Airbnb, Vrbo):
- Focus on inviting atmosphere and natural lighting.
- A versatile zoom helps capture small and large spaces alike.
Ideal Lens:
Tamron 11–20mm f/2.8 (APS-C) or Nikon Z 14–30mm f/4.
3. Set a Realistic Budget
Lens prices vary widely — but great real estate results are possible at nearly every price level.
💰 Price Tiers Overview:
| Category | Budget Range (USD) | Examples | Best For |
| Entry-Level | $300–700 | Sigma 10–20mm f/3.5, Tokina 11–16mm f/2.8 | Beginners, part-time shooters |
| Mid-Range | $700–1,500 | Tamron 11–20mm f/2.8, Nikon Z 14–30mm f/4 | Serious hobbyists |
| Professional | $1,500–2,500+ | Canon RF 15–35mm f/2.8L, Sony 16–35mm GM II | Full-time real estate photographers |
💬 Pro Tip:
Spend wisely — your lens quality impacts image sharpness more than your camera body does.
4. Consider Practical Features That Matter for Real Estate Photography
When evaluating lenses, look beyond brand loyalty — and focus on features that directly improve real estate shots.
✅ Key Features to Prioritize:
- Low Distortion: Essential for straight walls and architecture.
- Sharpness at f/8–f/11: The aperture range most used in real estate.
- Fast, Silent Autofocus: For quick room transitions.
- Weather Sealing: Protects against dust and humidity in exterior shoots.
- Image Stabilization (IS/VR/OSS): Helps for handheld twilight shots.
📊 Fact:
According to Real Estate Photographer Pro (2026), lenses with built-in stabilization reduce blurry photos by up to 45% in handheld scenarios.
5. Think About Portability and Workflow
You’ll often shoot multiple rooms, climb stairs, or switch angles rapidly — a heavy, bulky lens can slow you down.
🏃♂️ Mobility Factors:
- Lighter lenses (under 600g) reduce fatigue during all-day shoots.
- Compact zooms like the Sony 16–35mm f/4 G PZ or Nikon Z 14–30mm f/4 are ideal for travel or quick setups.
💬 Pro Tip:
If you shoot solo, prioritize lightweight gear that’s easy to reposition on a tripod.
6. Match Lens Type to Your Workflow
🔸 Zoom Lenses:
- Versatile and efficient for fast-paced real estate work.
- Cover multiple focal lengths in one lens.
- Perfect for agents or freelancers shooting many listings weekly.
Examples:
Canon RF 15–35mm f/2.8L, Nikon Z 14–30mm f/4, Tamron 11–20mm f/2.8.
🔸 Prime Lenses:
- Exceptional sharpness and low-light performance.
- Require more repositioning — better for slow, detailed architectural work.
Examples:
Sigma 14mm f/1.8 Art, Samyang 24mm f/1.4.
💬 Pro Tip:
If you only buy one lens — make it a wide-angle zoom. It’s the single most important tool for real estate photographers.
7. Plan for Long-Term ROI
A high-quality lens is an investment, not an expense. Professional lenses last for years and hold their value — even through multiple camera upgrades.
✅ ROI Factors:
- Build quality and resale value.
- Cross-platform compatibility (e.g., Sigma Art, Tamron).
- Future-proof focal lengths (16–35mm remains an industry standard).
📊 Fact:
Pro-grade lenses retain 65–80% of their resale value after 3 years (LensRentals Market Data 2026).
8. Test Before You Buy
If possible, rent or borrow before making a final purchase.
✅ Where to Try Lenses:
- LensRentals.com or BorrowLenses.com offer weekly rentals.
- Local camera stores often let you test shots in-store.
- Compare side-by-side images at different focal lengths.
💬 Pro Tip:
Take sample shots in real rooms — not just outdoors — to evaluate distortion and coverage realistically.
9. Avoid Over-Investing Too Early
New photographers often rush to buy expensive lenses without mastering composition, exposure, and lighting first.
Start small, learn your equipment, and upgrade strategically.
💬 Pro Advice:
“It’s better to master a $500 lens than misuse a $2,000 one.”
— Scott Kelby, Photographer & Author
10. Final Checklist Before Buying
Here’s a pre-purchase checklist to guide your final decision:
✅ The lens is compatible with your camera mount
✅ Covers a focal length range of 10–24mm (APS-C) or 14–35mm (Full Frame)
✅ Has low distortion and sharp corners at f/8–f/11
✅ Includes image stabilization (optional, but helpful)
✅ Fits your budget and long-term goals
If you can tick off most of these boxes, you’ve found a good lens for real estate photography that will serve you for years.
Final Thoughts
Choosing the right lens is about balance — between budget, performance, and creative freedom.
- Beginners should prioritize versatility and affordability (like the Sigma 10–20mm or Tamron 11–20mm).
- Intermediate photographers should focus on optical quality and distortion control (like the Nikon Z 14–30mm).
- Professionals should invest in flagship full-frame zooms or tilt-shift lenses for ultimate precision.
“The right lens doesn’t just capture the space — it defines your visual style.”
— Peter Hurley, Commercial Photographer
Frequently Asked Questions About Good Lenses for Real Estate Photography (FAQ)
When searching for a good lens for real estate photography, photographers — especially beginners — often have similar questions. Below are the most common ones, answered clearly and comprehensively to help you make informed decisions.
1. What Is the Best Lens for Real Estate Photography?
The best lens depends on your camera and shooting style. However, the most recommended lenses for real estate photography are wide-angle zooms between 14mm and 24mm (for full-frame) or 10mm–18mm (for APS-C).
Top Picks by System:
- Canon: RF 15–35mm f/2.8L IS USM
- Nikon: Z 14–30mm f/4 S
- Sony: 16–35mm f/4 G PZ
- Fujifilm: XF 10–24mm f/4 R OIS WR
- Panasonic/Olympus (MFT): 7–14mm f/2.8 PRO
💬 Pro Tip:
If you’re unsure, a 16–35mm (full-frame) or 10–20mm (APS-C) is the safest all-around choice for stunning real estate interiors and exteriors.
2. Do You Need a Wide-Angle Lens for Real Estate Photography?
Yes — wide-angle lenses are essential for real estate photography.
They let you capture entire rooms in one frame, making spaces look open, balanced, and inviting. A lens that’s too narrow will crop out vital context, making rooms appear smaller than they are.
Recommended Focal Range:
- Full-frame cameras: 14–24mm
- APS-C cameras: 10–18mm
- Micro Four Thirds: 7–14mm
📊 Fact:
According to Real Estate Photographer Survey 2026, 87% of top-rated real estate listings use wide-angle lenses between 14–20mm.
3. Is a 50mm Lens Good for Real Estate Photography?
A 50mm lens is not ideal for interior real estate photography. It’s too narrow to capture wide spaces. However, it can be useful for detail or lifestyle shots, such as décor close-ups, furniture textures, or exterior architectural elements.
✅ Use 50mm for:
- Highlighting design details
- Shooting exteriors or backyards
- Creating artistic depth-of-field images
❌ Avoid 50mm for:
- Tight interiors
- Small bathrooms or bedrooms
💬 Tip:
If you only have a 50mm lens, step back as far as possible or stitch multiple images together in post-processing.
4. What Is the Ideal Focal Length for Real Estate Photography?
The ideal focal length for real estate photography depends on your camera’s sensor type:
| Sensor Type | Ideal Range | Equivalent Field of View |
| Full Frame | 14–24mm | Wide to ultra-wide |
| APS-C | 10–18mm | Equivalent to ~16–28mm full-frame |
| Micro Four Thirds | 7–14mm | Equivalent to ~14–28mm full-frame |
This range lets you capture entire rooms without excessive distortion, maintaining realism while still enhancing perceived space.
5. Are Prime Lenses Good for Real Estate Photography?
Yes — prime lenses can produce extremely sharp, high-quality images.
However, they’re less flexible because you need to physically move to change composition. That’s not always convenient in small interiors.
✅ Best Prime Lenses for Real Estate:
- Sigma 14mm f/1.8 DG HSM Art
- Samyang 24mm f/1.4
- Laowa 15mm f/4 Shift
Use primes when:
- You prioritize maximum sharpness and low distortion.
- You shoot architectural or luxury properties.
Otherwise, a zoom lens is better for everyday real estate work.
6. What Aperture Is Best for Real Estate Photography?
Most real estate photographers shoot between f/8 and f/11.
This aperture range gives:
- Maximum sharpness across the frame.
- Deep depth of field, keeping foreground and background in focus.
- Minimal optical flaws like vignetting or chromatic aberration.
💬 Pro Tip:
Avoid shooting wide open (like f/2.8) unless you’re going for a creative, shallow-focus look — which is rare in real estate.
7. How Do You Avoid Lens Distortion in Real Estate Photography?
All wide-angle lenses have some distortion, but you can minimize it through both technique and post-processing.
Tips to Reduce Distortion:
- Keep your camera perfectly level (use a tripod with a bubble level).
- Avoid tilting the camera upward or downward.
- Correct distortion automatically in Lightroom or Photoshop using lens profiles.
- Choose lenses known for low native distortion, like the Nikon Z 14–30mm f/4 or Canon TS-E 17mm.
📊 Fact:
Tilt-shift lenses reduce perspective distortion by up to 90% when used correctly.
8. What’s the Best Budget Lens for Real Estate Photography?
If you’re just starting out, here are budget-friendly lenses that deliver pro-level results under $700:
| Camera Mount | Lens | Approx. Price (USD) |
| Canon APS-C | Sigma 10–20mm f/3.5 | $449 |
| Nikon Z DX | Tokina 11–16mm f/2.8 | $499 |
| Sony APS-C | Tamron 11–20mm f/2.8 | $699 |
| Fujifilm X | Fujifilm XF 10–24mm f/4 (used) | $600 |
| MFT | Panasonic 7–14mm f/4 | $499 |
💬 Tip:
Used lenses can offer 30–40% savings with little performance loss. Check reputable sites like KEH or MPB.
9. Do You Need a Tilt-Shift Lens for Real Estate Photography?
Not always — but tilt-shift lenses are game changers for high-end architectural work.
They allow you to:
- Correct converging vertical lines.
- Adjust perspective without moving the camera.
- Keep interiors perfectly proportioned.
They’re more expensive (typically $1,200–2,500) but worth it for professional architectural photographers or luxury property specialists.
10. Can You Use a Kit Lens for Real Estate Photography?
Technically yes, but most kit lenses (18–55mm) aren’t wide enough for small spaces. You’ll struggle to capture entire rooms or maintain straight lines.
If you must use one:
- Stick to the widest end (18mm).
- Stand back as far as possible.
- Correct distortion in post-processing.
💬 Pro Tip:
Upgrade to a dedicated wide-angle lens as soon as you can. It’s the single best investment you’ll make for real estate photography.
11. What Other Gear Do You Need Besides a Lens?
Your lens is just one part of your toolkit. To get professional results, you’ll also need:
- Tripod: For steady, level shots.
- Remote shutter or timer: Prevents camera shake.
- Flash or strobe lighting kit: For evenly lit interiors.
- Circular polarizer: Reduces reflections on windows and floors.
- Editing software: Adobe Lightroom or Capture One.
📊 Fact:
Listings photographed with professional gear sell 32% faster on average (Realtor.com data, 2024).
12. How Do You Photograph Small Rooms Without Distortion?
Use a wider focal length (around 14–16mm full-frame) and keep the camera level at chest height.
Steps:
- Mount your camera on a tripod.
- Center the lens horizontally to balance walls.
- Use f/8 for edge-to-edge sharpness.
- Correct minor barrel distortion in editing.
💬 Bonus Tip:
If the room still feels cramped, try panorama stitching — shoot overlapping frames and merge them in Lightroom.
13. Should You Use a Zoom or Prime Lens for Real Estate?
Most professionals prefer zoom lenses because they save time. You can reframe compositions instantly without moving the tripod.
Prime lenses excel in:
- Architectural photography
- Low-light detail shots
- Creative compositions
But for real estate listings, wide-angle zooms are the practical choice.
💬 Quick Rule:
“Zoom for efficiency, prime for perfection.”
14. Is Image Stabilization Important for Real Estate Photography?
It helps — but it’s not essential. Since most real estate shots are taken on a tripod, stabilization doesn’t play a big role.
However, it’s handy for:
- Handheld twilight exteriors
- Quick video walkthroughs
- HDR brackets without a tripod
If you shoot handheld often, choose a lens with built-in IS, OSS, or VR.
15. What Is the Most Important Feature to Look for in a Lens?
The most important feature is low distortion and sharpness at mid apertures (f/8–f/11).
Everything else — autofocus speed, weight, or maximum aperture — comes second.
Distortion-free images with crisp details are what make real estate photos look professional and trustworthy.
Final Takeaway
When choosing a good lens for real estate photography, prioritize:
- Wide focal length (14–24mm)
- Low distortion and edge sharpness
- High-quality glass within your budget
Remember, the lens shapes your storytelling power. With the right one, you can make any property look spacious, bright, and appealing — exactly what potential buyers want to see.
Conclusion: Finding the Perfect Lens for Real Estate Photography
Choosing a good lens for real estate photography isn’t just about picking the widest one — it’s about selecting the right tool for your creative vision, workflow, and budget. The lens you choose directly affects how potential buyers feel about a property before they ever step inside.
A lens that captures crisp details, balanced lighting, and accurate proportions can make a $300,000 listing look like a $500,000 home. That’s the power of great real estate photography — and it all starts with the right lens.
Key Takeaways
To summarize what we’ve covered throughout this in-depth guide:
| Factor | Why It Matters | Recommended Range / Example |
| Focal Length | Controls field of view and perspective | 14–24mm (Full Frame) / 10–18mm (APS-C) |
| Distortion Control | Keeps walls straight and rooms realistic | Lenses with built-in correction or tilt-shift design |
| Aperture (f/8–f/11) | Ensures sharp, detailed images | Most real estate photographers shoot at f/8 |
| Lens Type | Zooms for versatility, primes for precision | Canon RF 15–35mm f/2.8L, Nikon Z 14–30mm f/4 |
| Budget Planning | Prevents over-investing early | Start under $1,000, upgrade as you grow |
| Post-Processing Compatibility | Enables easy distortion and color correction | Lightroom, Capture One, DxO PhotoLab |
💬 Pro Tip:
“Your lens defines the space — but your vision defines the story.”
— Mike Kelley, Architectural Photographer
Choosing a Lens That Matches Your Goals
Let’s simplify your decision path:
- 🎓 Beginner photographers → Start with a budget wide-angle zoom like the Sigma 10–20mm f/3.5 or Tamron 11–20mm f/2.8.
- 📸 Intermediate users → Go for a versatile professional zoom like the Nikon Z 14–30mm f/4 or Canon RF 15–35mm f/2.8.
- 🏢 Professional photographers → Invest in tilt-shift or ultra-wide primes for architectural precision, such as the Canon TS-E 17mm or Laowa 15mm Shift.
No matter your level, aim for clarity, depth, and realism. Those qualities sell homes faster, attract more clicks, and establish your reputation as a trusted real estate photographer.
Final Thoughts
The perfect real estate lens does more than just capture rooms — it translates emotion into images.
It makes spaces feel open, balanced, and aspirational.
So whether you’re photographing cozy apartments or luxury penthouses, remember:
- Use wide-angle lenses wisely — not to exaggerate space, but to invite viewers in.
- Prioritize quality over quantity — one great lens can outshine an entire cheap kit.
- Master your technique — the best gear still needs a skilled eye behind it.
When you pair technical precision with artistic intent, your photos will not only rank well on search engines — they’ll also rank high in your clients’ minds.
Your Next Step
If you found this guide useful:
- 📷 Bookmark this post for future reference.
- 🔗 Check out our upcoming article: “Best Camera Settings for Real Estate Photography”.
- 💬 Share your favorite lens or real estate photography tip in the comments — we’d love to hear from you!

